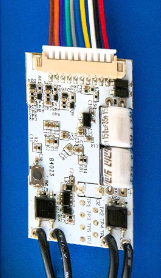
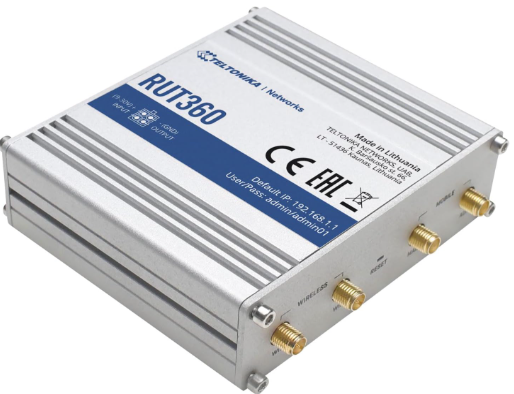
Si tratta di un semplicissimo antifurto per VAN e/o Camper basato su router RU360 (vedere qui per i dettagli) e Shelly Plus Uni (WiFi 2.4 Ghz, vedere qui per i dettagli) e alcuni cablaggi per ottenere l’indicazione delle luci accese quando vengono aperte le porte dell’abitacolo o del portellone posteriore o porta laterale del nostro VAN.
Ovviamente la scena di Shelly ci invia un allarme sul nostro cellulare.
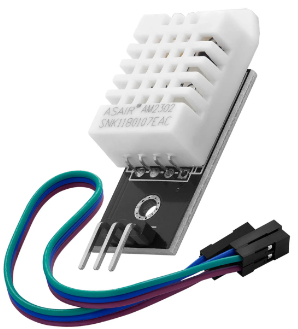
Usando lo Shelly Plus Uni abbiamo inserito anche un sensore di Temperatura e Umidità (DHT22) e con l’ingresso ANALOG IN monitoriamo la batteria ausiliaria del VAN e/o Camper.
This is a very simple VAN and/or Camper anti theft (alarm) based on router RUT360 (see here for more details) and Shelly Plus Uni (WiFi 2.4 Ghz, see here for details) and some wiring for get the indication of lights on when are opened the cabine dors or rear door or lateral door on our VAN.
Of course the Shelly Scene send us on our mobile phone an allarm.
Using the Shelly Plus Uni we have also inserted a Temperature and Humidity sensor (DHT22) and with the ANALOG IN input we monitor the auxiliary battery of the VAN and/or Camper.
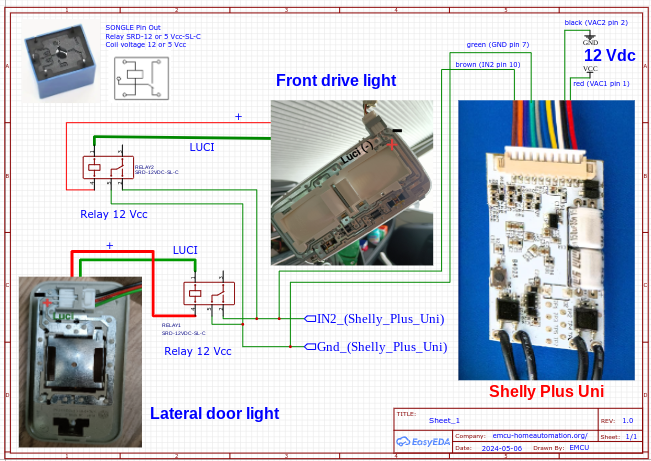
Schematics
Schema
Il cablaggio è molto semplice, utilizziamo due relè (a 12Vcc) in parallelo alle luci della plafoniera di guida e salendo dalla porta laterale del VAN e/o Camper.
Le uscite dei relè Normalmente Aperte sono collegate in parallelo e poi sono collegate a GND e IN 2 (o IN 1, come preferite) di Shelly Plus Uni.
Vedere il cablaggio di seguito.
The wiring is very simple, we use two relays (12Vdc) in parallel to the driving ceiling light and going up from the side door of the VAN and/or Camper.
The outputs of relays Normal Open are connected in parallel and next are connected to GND and IN 2 (or IN 1 as you prefer) of Shelly Plus Uni.
See the wiring below.
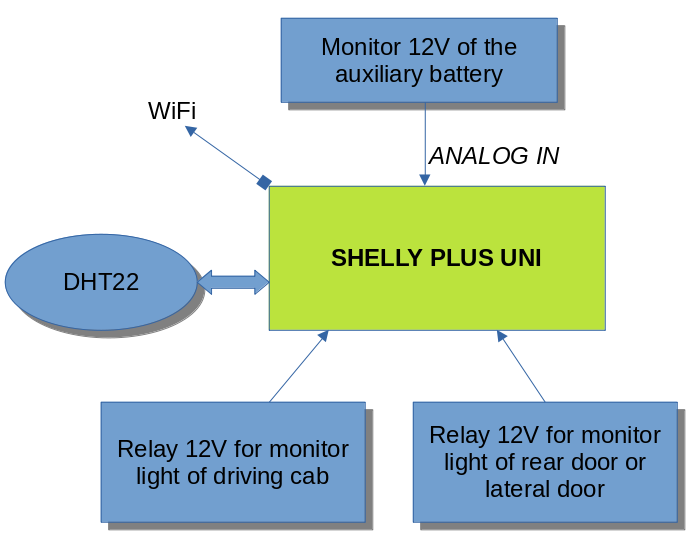
Per vedere come collegare il DHT22 guardare qui mentre semplicemente per monitorare la tensione della batteria ausiliaria, visto che questa è quella che alimenta tutta la nostra apparecchiatura, basta collegare il segnale ANALOG IN (pin 3) con il +12V di alimentazione dello Shelly PLUS UNI (pin 1).
To see how to connect the DHT22 look here, while simply to monitor the voltage of the auxiliary battery, since this is the one that powers all our equipment, just connect the ANALOG IN (pin 3) signal with the +12V power supply of the Shelly PLUS UNI (pin 1).
Se volete sapere come abbiamo fatto a prendere i contatti delle lampadine sul nostro VAN guardate qui.
If you want to know how we managed to get the contacts for the light bulbs on our VAN, look here, it’s in Italian but there are several explanatory images.
Sirena
Siren
A questo antifurto potete collegare anche una sirena a 12V pilotandola con l’uscita OUT 1 o OUT 2 ma ricordatevi che al massimo, queste uscite possono pilotare 300 mA, se ve ne servono di più pilotate un relè (Finder 35.51.7.012.0010 ) e poi con questo piloterete la vostra sirena.
Noi non abbiamo collegato nessuna sirena perchè abbiamo già un’altro antifurto installato con relativa sirena.
You can also connect a 12V siren to this alarm, driving it with the OUT 1 or OUT 2 output but remember that at most, these outputs can drive 300 mA, if you need more current drive a relay (Finder 35.51.7.012.0010) and then with this you will pilot your siren.
We have not connected any siren because we already have another burglar alarm installed with its siren.
Program your Shelly Plus Uni
Programmiano lo Shelly Plus Uni
Questa è la parte forse più complicata ma se ci mettete attenzione non avrete problemi.
Premessa noi diamo per scontato che abbiate l’APP di Shelly installata sul vostro cellulare e abbiate già registrato lo Shelly Plus Uni, in Internet vi sono diversi tutorial.
This is perhaps the most complicated part but if you pay attention to it you won’t have any problems.
We take it for granted that you have the Shelly APP installed on your mobile phone and have already registered the Shelly Plus Uni, there are various tutorials on the Internet.

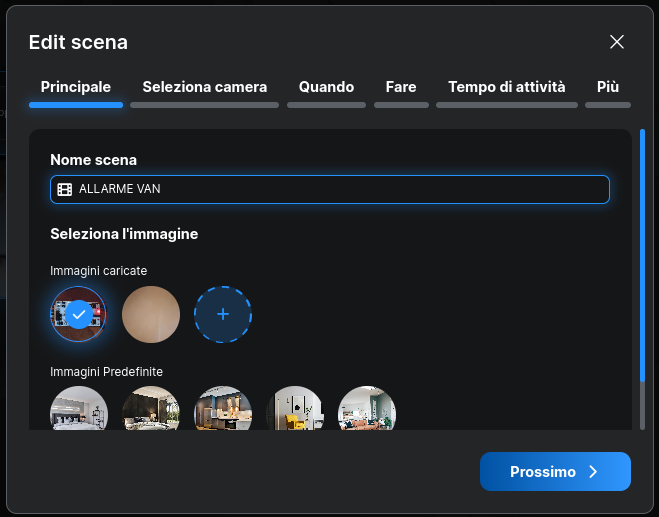
Per prima cosa dovete creare una scena.
Selezionate quindi scene e poi premete sul + (in alto) per inserire una nuova scena.
Date un nome alla scena e associate un’immagine.
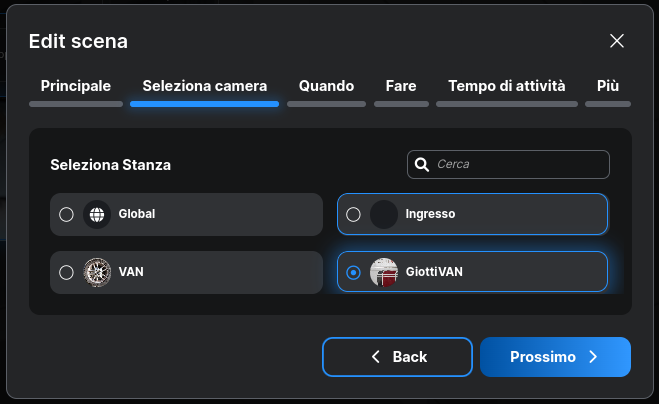
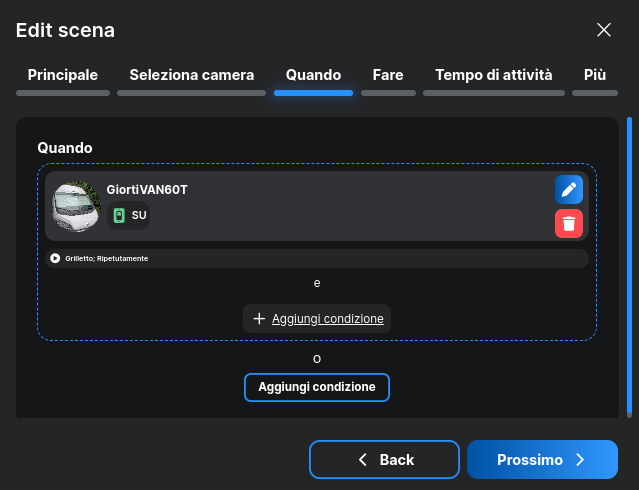
Selezionare la stanza, nel nostro caso GiottiVAN e aggiungere condizione.

Selezionare: Basato sul dispositivo.
Poi scegliere il dispositivo (VAN è la stanza) e poi l’ingresso da usare che noi abbiamo chiamato 2) VA1-Antifurto (è l’ingresso IN2).
Poi scegliere la proprietà del dispositivo ovvero: Stato di InPut.
Mettere pallino su: Quando cambio stato input è acceso
Poi nel: Watch the property as
mettete il pallino su: Trigger – controlla se lo stato del dispositivo è quello desiderato e attiva la scena
Poi mettere pallino su: Ripetutamente
e premere Salva e poi Prossimo.
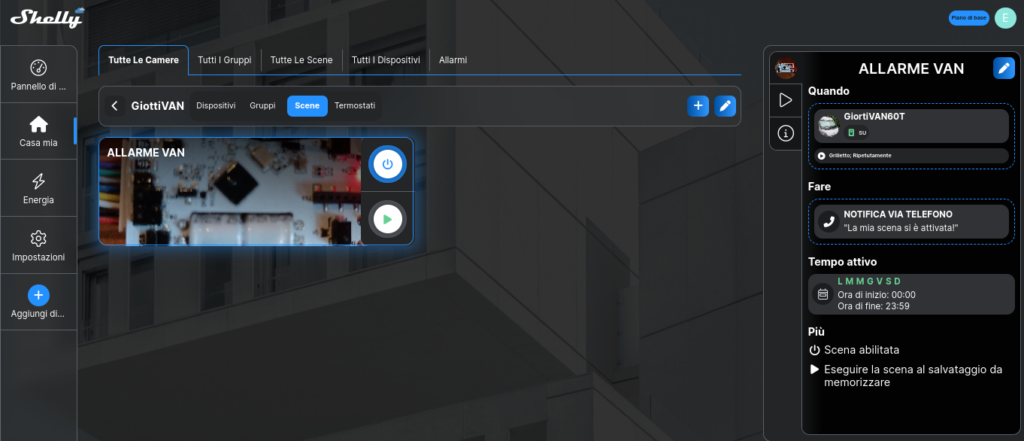
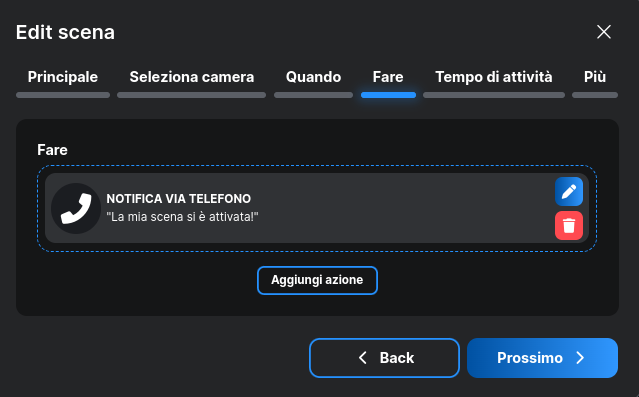
Dalla pagina che compare selezionare: Aggiungi Azione
In Selezione Azione, mettere il pallino su: Notifica dell’azione
Poi nell’area: Seleziona tipo di notifica
scegliere Telefono
e poi mettere pallino su Allarme
mentre su: Ritardo azione
lasciare 0
poi premere Salva e poi Prossimo
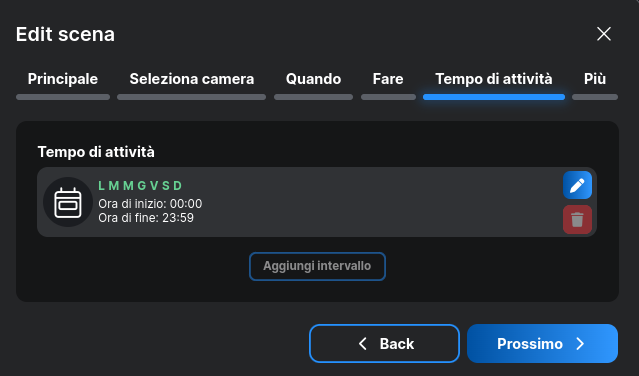
In Tempo di Attività
controllate che siano selezionati tutti i giorni della settimana e che l’orario sia da 00:00 a 23:59
Abbiamo finito e quindi premere Salva.
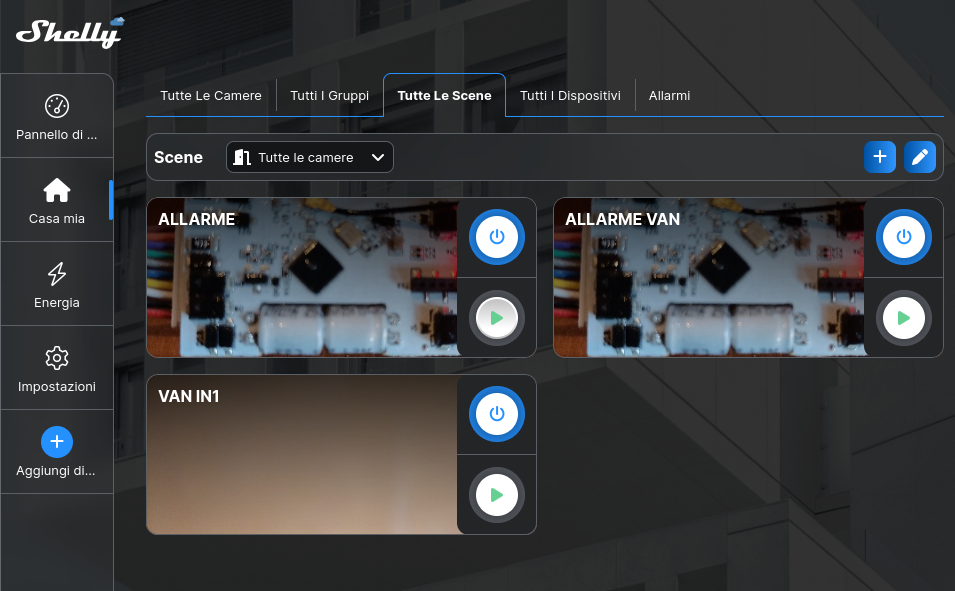
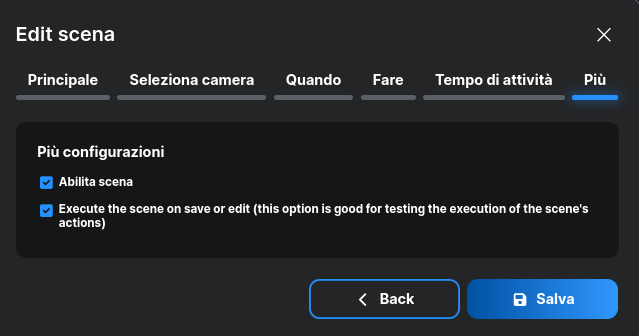
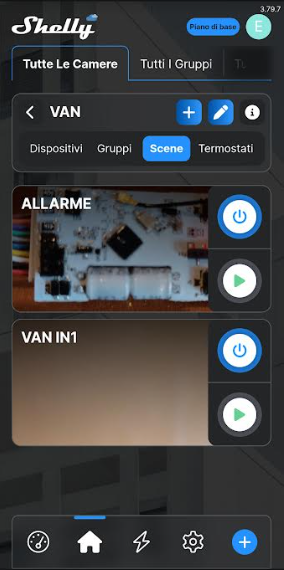
NOTA: per abilitare/disabilitare una scena dovete premere il tasto relativo alla scena.
Qui sotto ci sono le scene ALLARME e VAN IN1 che sono entrambe attive.
Se IN1 o IN2 verranno chiusi riceveremo la notifica sul cellulare che suonerà anche similmente ad un’antifurto.
Per zittirlo basta premere un tasto fisico del cellulare.
First you need to create a scene.
Then select scenes and then press the + (at the top) to insert a new scene.
Give the scene a name and associate an image.
Select the room, in our case VAN and add condition.
Select: Based on device.
Then choose the device (VAN is the room) and then the input to use which we have called 2) VA1-Anti-theft (it is the IN2 input).
Then choose the device property: Input Status
Put the dot on: When I change the input state it is on
Then in: Watch the property as
put the dot on: Trigger – checks if the device status is the desired one and activates the scene
Then put the dot on: Repeatedly
and press Save and then Next.
From the page that appears select: Add Action
In Action Selection, put the dot on: Action notification
Then in the area: Select notification type
choose Phone
and then put the dot on Alarm
while on: Action delay
leave 0
then press Save and then Next
In Activity Time
check that all days of the week are selected and that the time is from 00:00 to 23:59
We are done and then press Save.
NOTE: to enable/disable a scene you must press the scene button.
Below are the ALARM and VAN IN1 scenes which are both active.
If IN1 or IN2 are closed we will receive the notification on the mobile phone which will also sound similar to a burglar alarm.
To silence him, just press a physical button on your cell phone.
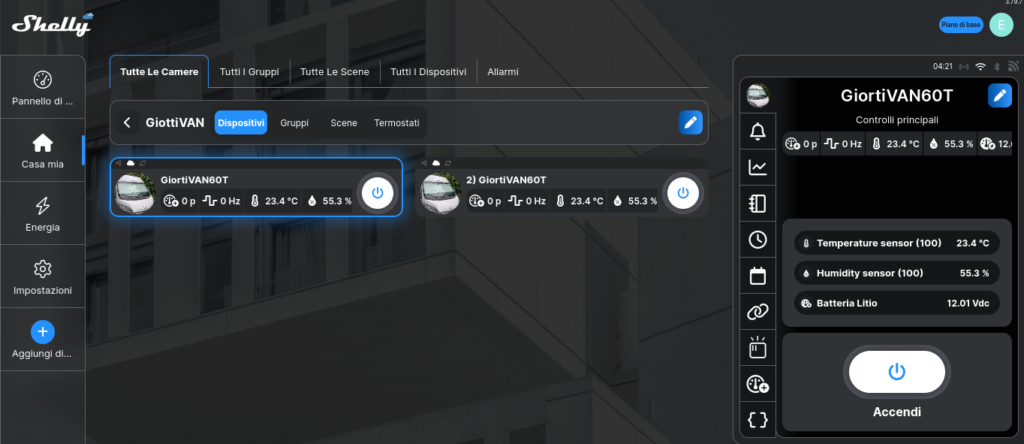
Monitor di Temperatura, Umidità e Tensione batteria ausiliaria
Monitor the Temperature, Humidity and Auxiliary Battery Voltage
Grazie al Shelly Plus Uni si ha la possibilità di collegargli una sonda di temperatura e umidità e monitorare il 12 Vcc di alimentazione che vuol dire la tensione della batteria ausiliaria del VAN e/o Camper.
A questo proposito guardate gli schemi applicativi che trovate qui.
Thanks to the Shelly Plus Uni you have the possibility of connecting one temperature and humidity probes and monitoring the 12 Vdc power supply which means the voltage of the auxiliary battery of the VAN and/or Camper.
In this regard, look at the application diagrams you find here.
Installazione del sensore di temperatura e umidità DHT22
Installation of the DHT22 temperature and humidity sensor

Consumi
Consumption
Shelly Plus Uni circa 20 mA
RUT360 alla massima connessione di dati e reti interne (WiFi + LAN) circa 400 mA (vedere i dati ufficiali qui)
Shelly Plus Uni approximately 20 mA
RUT360 at maximum data connection and internal networks (WiFi + LAN) approximately 400 mA (see official data here)
Dissipazione calore
Heat dissipation
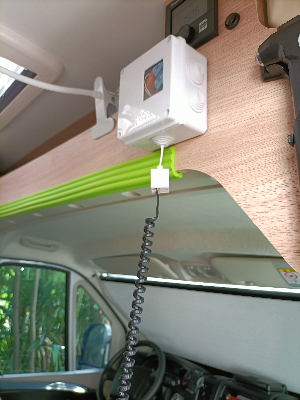
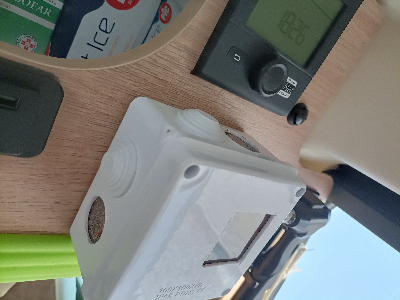
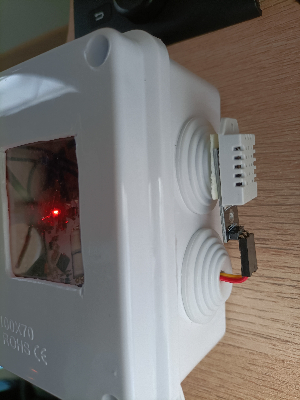
Il kit basato sullo Shelly Plus Uni è stato messo in una scatoletta di derivazione da elettricisti in cui abbiamo effettuato una feritoia poi richiusa con una plastica trasparente per monitorare il led presente sullo Shelly ma abbiamo sostituito anche due tappi con altrettante plastiche forate per fare circolare l’aria.
Sui VAN e/o Camper le temperature possono salire anche molto e quindi è meglio prevedere un’areazione per la nostra elettronica.
The kit based on the Shelly Plus Uni was placed in an electrician’s junction box in which we made a slit and then closed it with transparent plastic to monitor the LED on the Shelly but we also replaced two caps with the same number of perforated plastics to circulate the ‘air.
On VANs and/or Campers, temperatures can rise significantly and therefore it is better to provide ventilation for our electronics.
Variante antifurto ancora più semplice
Even simpler anti-theft variant
Se non volete cablare i segnali delle luci per sapere quando aprono le portiere del VAN potete usare i contatti per porte e finestre di Shelly che potete trovare qui e qui.
If you don’t want to wire the light to know when the VAN doors open you can use Shelly’s door and window contacts which you can find here and here.


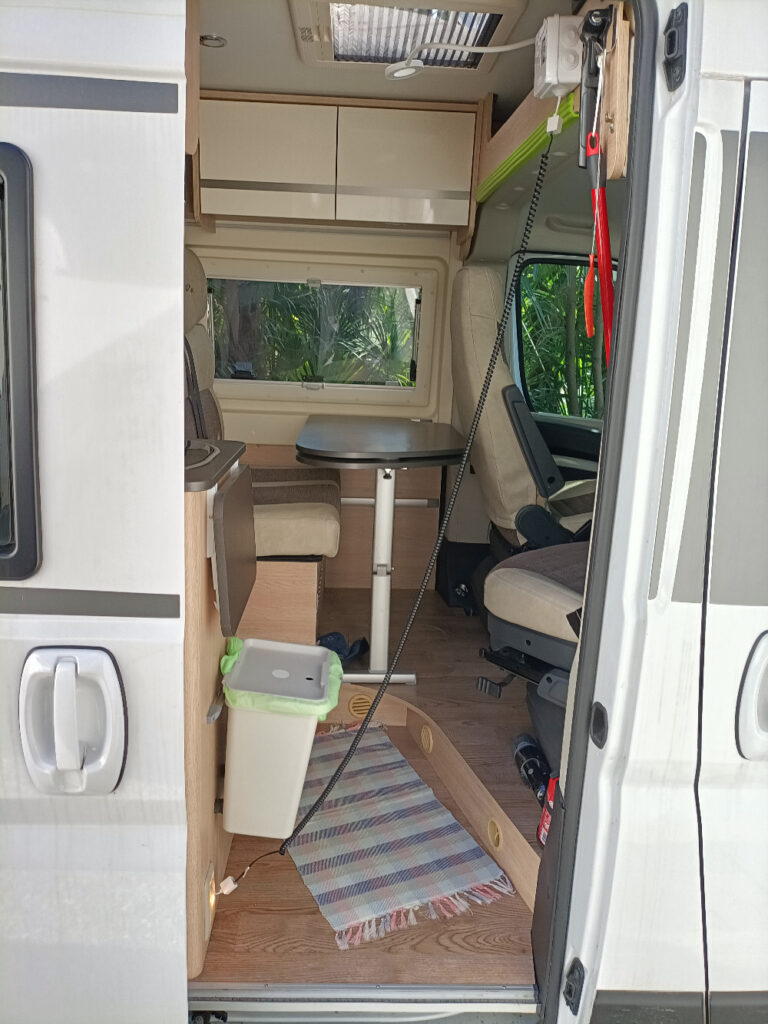
Immagini
Images