- Technical Specifications
- Introduction
- Possible wiring at 220Vac
- How to use Shelly 1 in Home Assistant
- Example of automation
- Add all the features of Shelly 1 to Home Assistant
- Suggested extra configurations in local WEB Shelly 1 interface
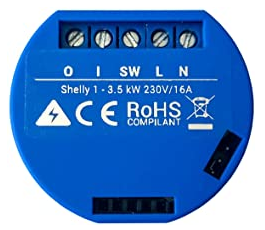
Technical Specifications
Shelly 1 is a WiFi module with the following specification:
- 1 input
- 1 output (relay) max load 16A at 220Vac (resistive)
- Power supply: 110-240V ±10% 50/60Hz AC – 30-50V DC – 12V DC
- Working temperature: -20 + 40 °C
- Radio protocol: WiFi 802.11 b/g/n
- Operational range (depending on local construction):
- up to 50 m outdoors
- up to 30 m indoors
- Dimensions (HxWxL):41 x 36 x 17 mm
- Electrical consumption:< 1 W
You can find Shelly 1 for example here.
The Datasheet is here, more info are here.
Introduction
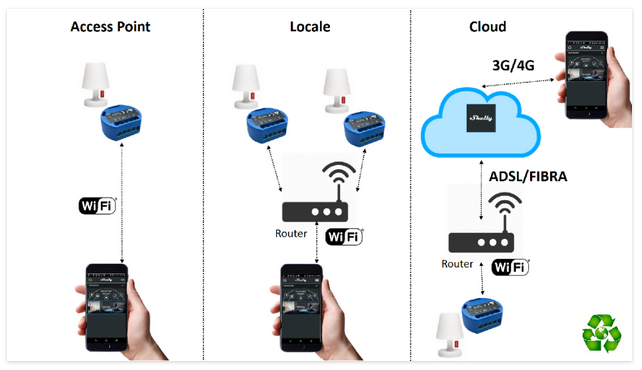
Shelly 1 is very flexible because permit you read/drive it via Internet or via Home Assistant (MQTT and we suggest to use Mosquitto broker in Home Assistant).
The APP for Android is here (control via Internet).
It’s also available for IoS.
The 3 possible connections with Shelly 1 via smartphone are shown below.
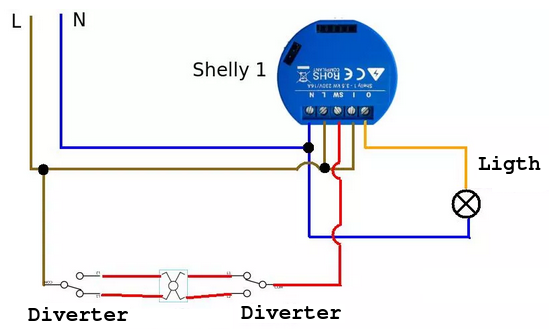
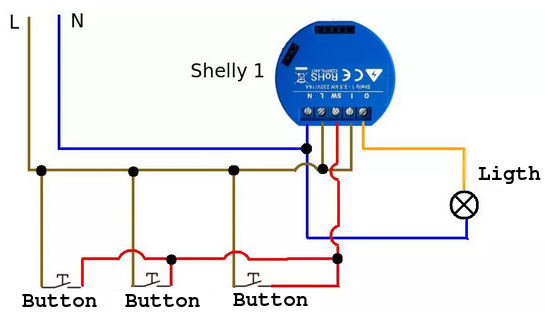
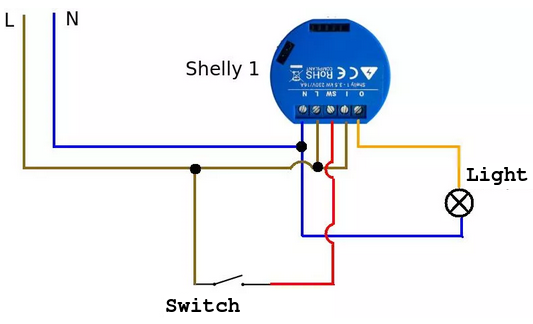
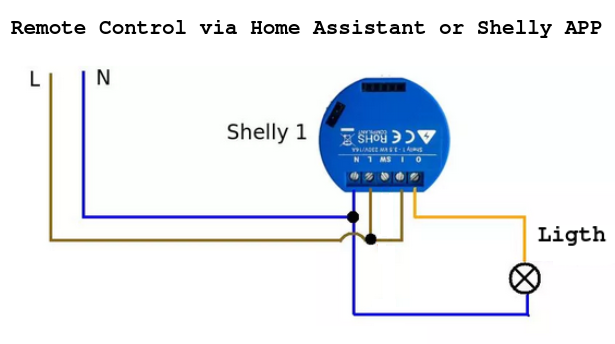
Possible wiring at 220Vac
How to use Shelly 1 in Home Assistant
For use the Shelly 1 in your Home Assistant we suggest to do step below.
- Install the Shelly APP on your smartphone, register it and connect your new Shelly 1 and test it. (Search on internet, there are a lot of tutorials that explain how to do.)
- Install in your Home Assistant the Mosquitto broker for use the MQTT.
- Find the IP (address) of your Shelly 1 in your WiFi network. (For ANDROID we suggest to use the FING for identify the IP of your Shelly)
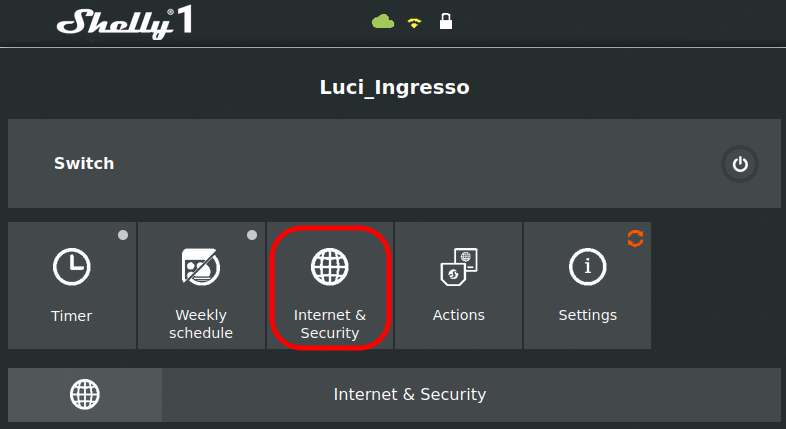
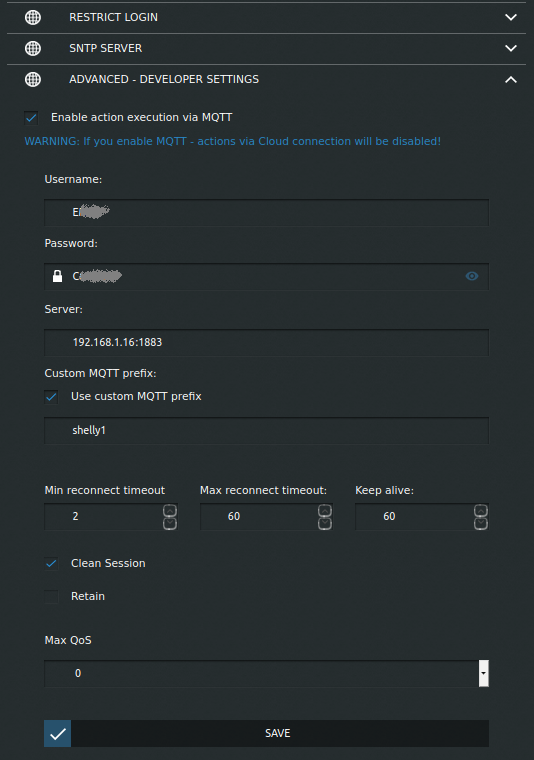
- Open a browser (on your PC) and type the IP of your Shelly 1 for reach the relative web-server. Enter in the INTERNET & SECURITY and enable MQTT (in ADVANCED – DEVELOPER SETTINGS), see below.
Below there is an example of configuration, before to exit of this page click on SAVE button.
The USERNAME and PASSWORD are the same that you set during the configuration of the Mosquitto broker.
If you don’t remember it, in Home Assistant select:
SUPERVISOR -> Mosquitto broker -> CONFIGURATION
The standard port of the MQTT broker is 1883
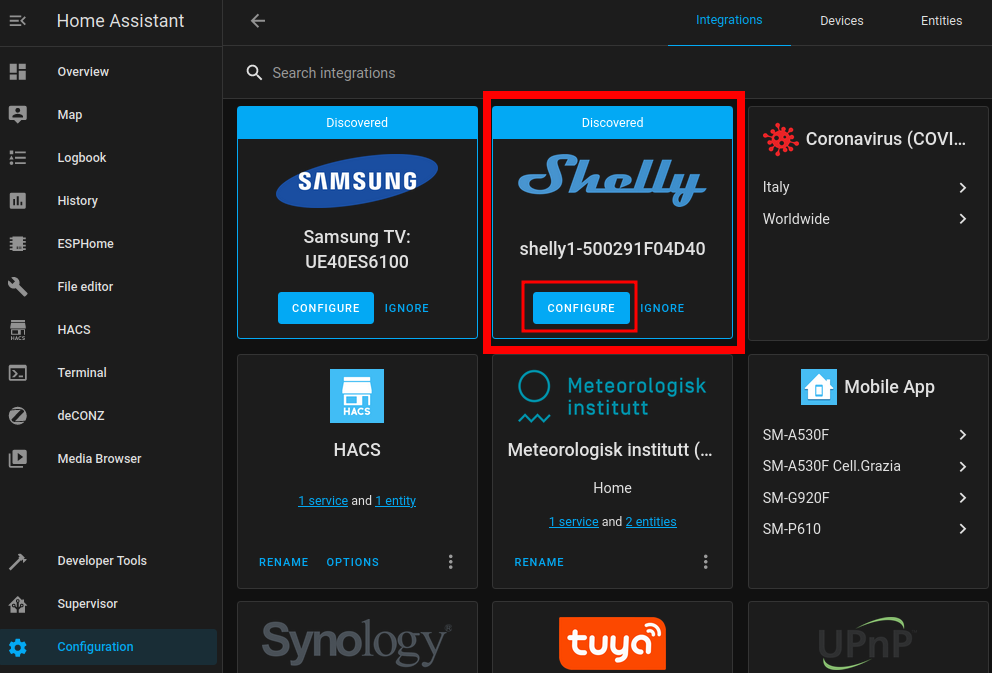
At this point, in Home Assistant select:
CONFIGURATION -> INTEGRATIONS
and select the CONFIGURE button present in the SHELLY box, see below.
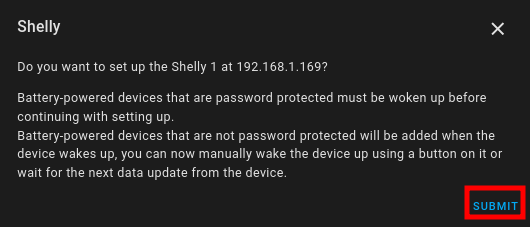
In the new popup that appears press SUBMIT, see below.
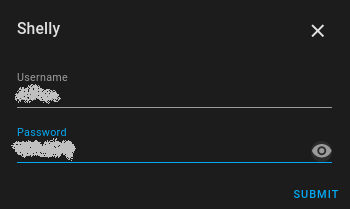
At this point insert the USERNAME and PASSWORD of your SHELLY 1 and press SUBMIT, see below.
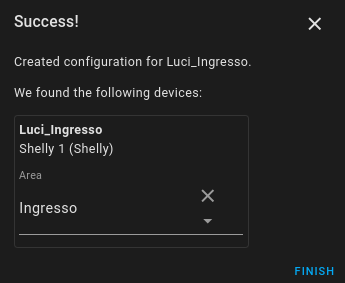
Automatically, in the new pop up that appears the Home Assistant show you the SHELLY that it found, see below.
Select an AREA (in our case is INGRESSO that means house entrance) and press FINISH.
ATTENTION
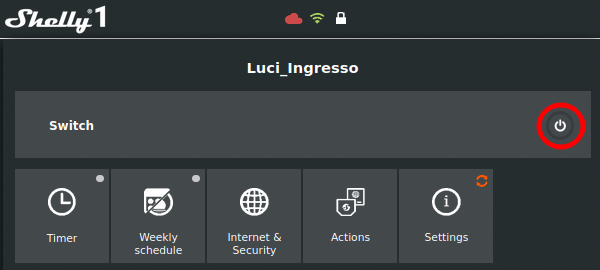
Now your Shelly 1 is registered in Home Assistant and you can control it from here but on the APP installed on your mobile phone it will NO longer be reachable, it will be OFFLINE.
You can still control your Shelly 1 from a browser by entering the IP of your Shelly 1 when connected to your home WiFi network.
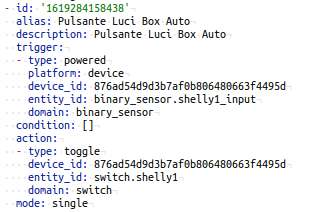
Example of automation
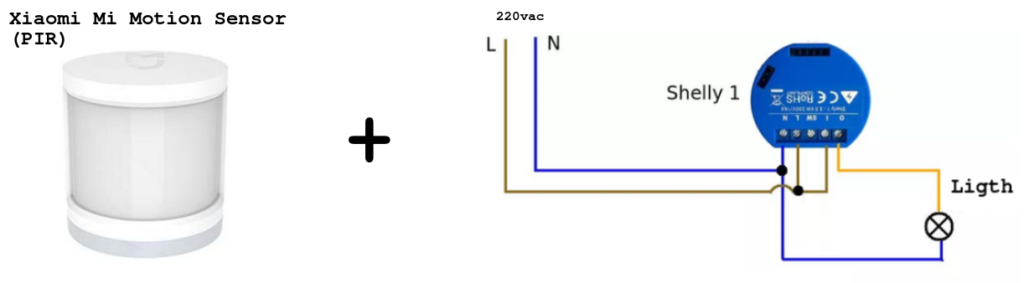
Example of automation in Home Assistant that use Shelly 1 and Xiaomi Motion Sensor (PIR) is here.
The automation allows entrance light (ligth_5) to be switched on at night for 2 minutes if movement is detected. At the same time the external lights are switched on and they are leave on because we use another automation that cyclically switch off the external lights.
The schematic is shown below.
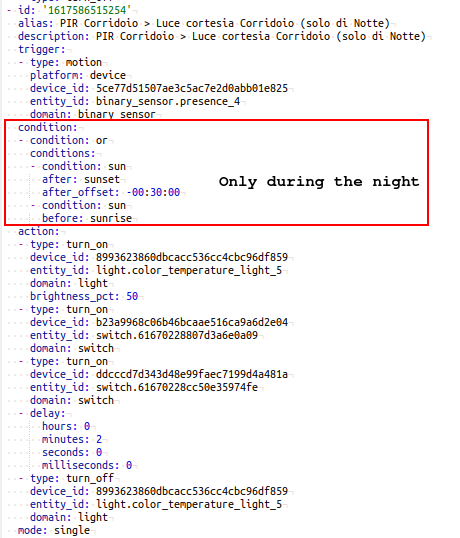
Below there is our example of the automation (automations.yaml).
Add all the features of Shelly 1 to Home Assistant
Not all the Shelly 1 features are immediately available during the first configuration. For add all the features select:
CONFIGURATIONS -> INTEGRATIONS -> SHELLY -> 6 ENTITIES
you must see the pages similar below
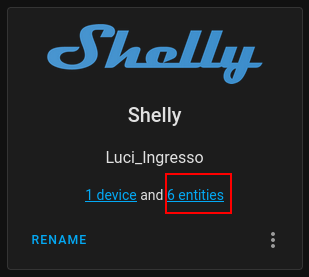
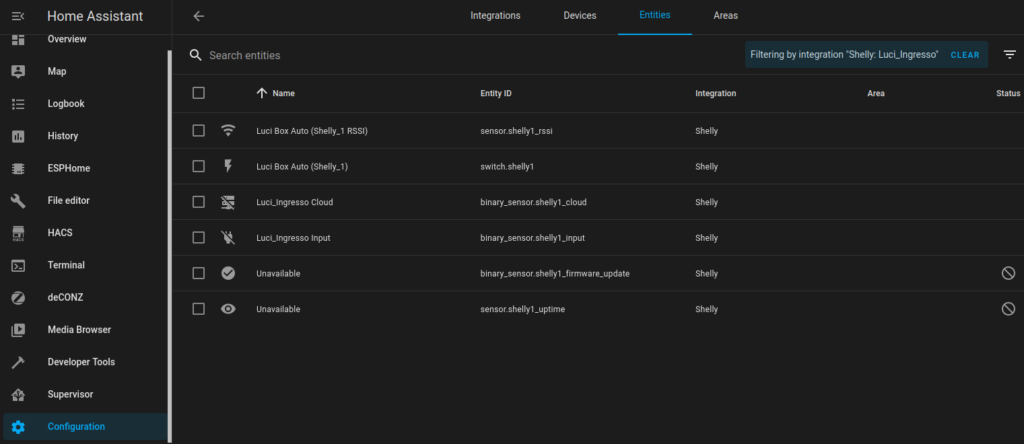
Now click on the feature that you need to use and enable it.
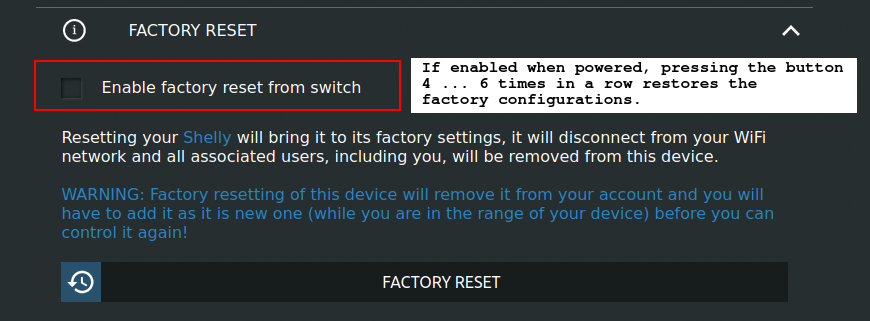
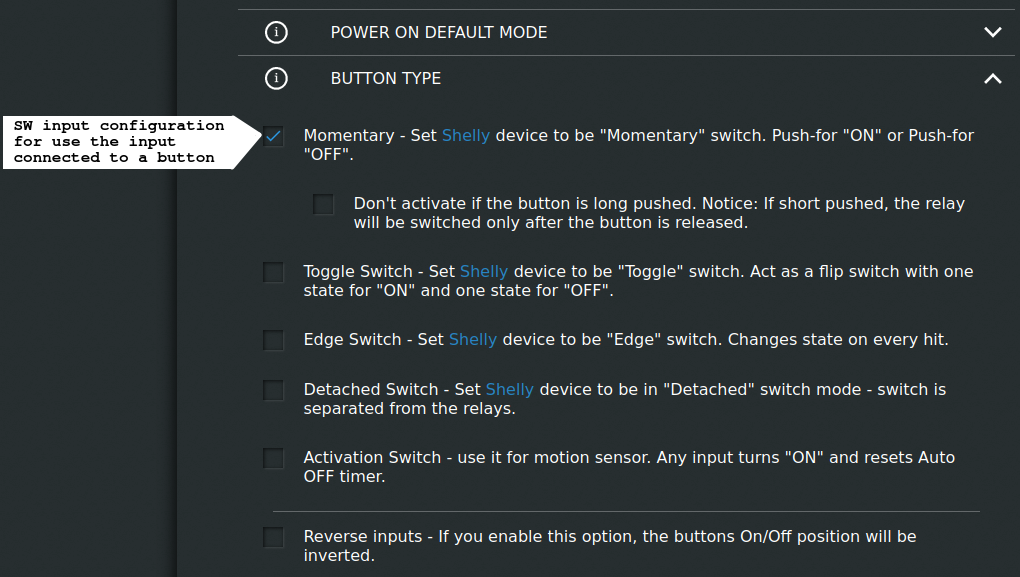
Suggested extra configurations in local WEB Shelly 1 interface
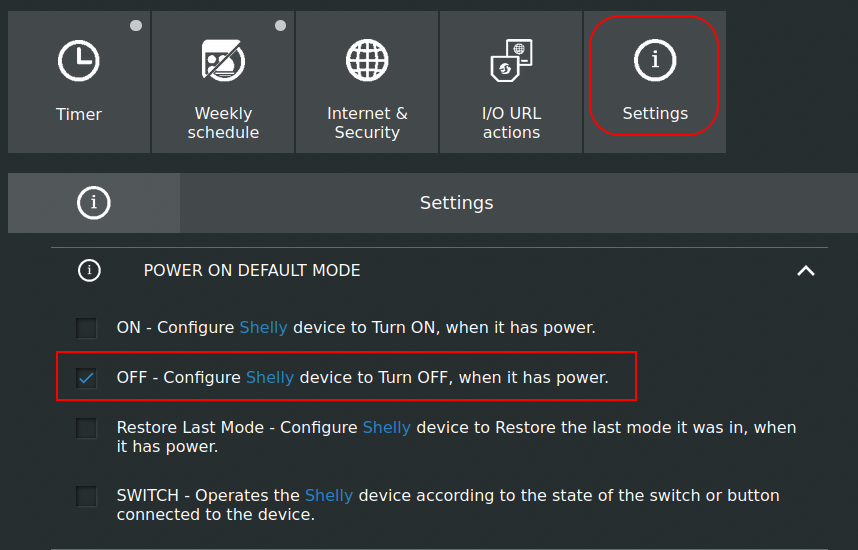
Button Type configuration for use the SW input connected to a button.
NOTE
The indication on Home Assistant but also on local WEB Shelly 1 interface, that the button has been pressed is not immediate but the toggle of the relay contained in the Shelly 1 is instead immediate.
The suggested wiring for button is below.
The relative AUTOMATION (in automations.yaml) is shown below.