

For access remotely to HA there are the possibility to use different add-on, we chose to use DUCK DNS (http://www.duckdns.org/).
DUCK DNS is Free Dynamic DNS (DynDNS or DDNS) service with Let’s Encrypt support.
For use DUCK DNS is necessary access to it from this web site:
http://www.duckdns.org/
after the access you see a page like below.
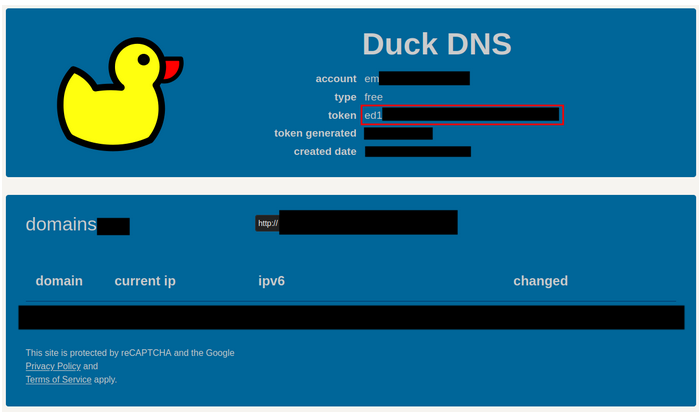
Important is copy the token, see above, and now back in HA:
SUPERVISOR -> DUCK DNS -> CONFIGURATION
and past the token in the line n.5.
Now back to:
http://www.duckdns.org/
and create your domain name, see the example below: pippo123
Copy: pippo123.duckdns.org
and back in HA:
SUPERVISOR -> DUCK DNS -> CONFIGURATION
and past in line n.6 the: pippo123.duckdns.org
and click on SAVE button.
Now wait 2…3 minutes, because Duck DNS end the generation of the necessary tokend and restart HA (Home Assistant):
CONFIGURATION -> SERVER CONTROLS
and press RESTART
Now is necessary open the port (port forwarding) on your ADSL modem, this is the difficult part because the way to do this change from one ADSL modem to other, see the video tutorial listed before.
For test your configuration open a browser and type your Duack DNS address that in our case is:
http://pippo123.duckdns.org:8123/
If all configurations are correct you must see the login page of your HA.
Fast Gate Open Port or Port Forwarding (in Italian language)
Se avete un abbonamento a Internet con FastWeb e avete il loro modem FastGate per aprire le porte seguite le spiegazioni qui sotto.
Collegatevi col vostro FastGate e andate nella pagina:
ADVANCED -> LAN SETTINGS ON MAIN NETWOR
guardate sotto.
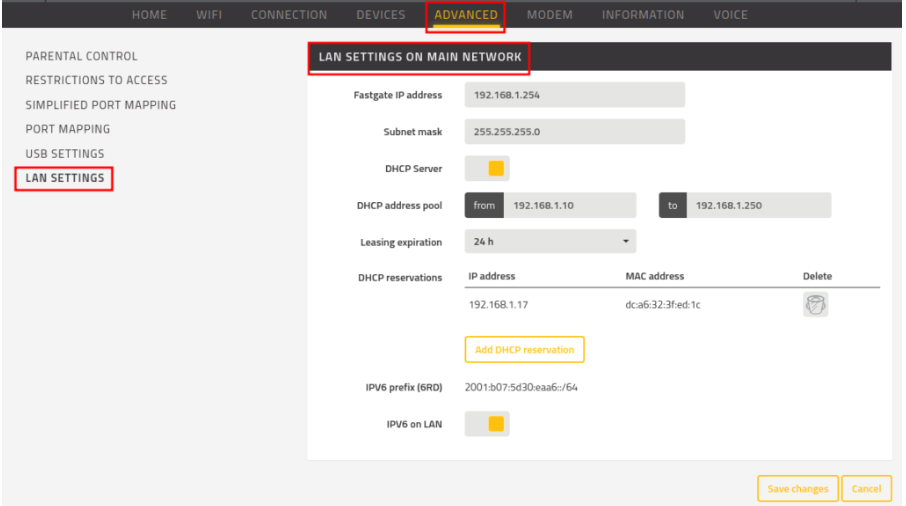
Dovete avere il DHCP SERVER abilitato, se non lo è abilitatelo.
Poi premete su: ADD DHCP RESERVATION
e nel popup che compare selezionate: homeassistant
e premete ADD (vedere immagine sotto).
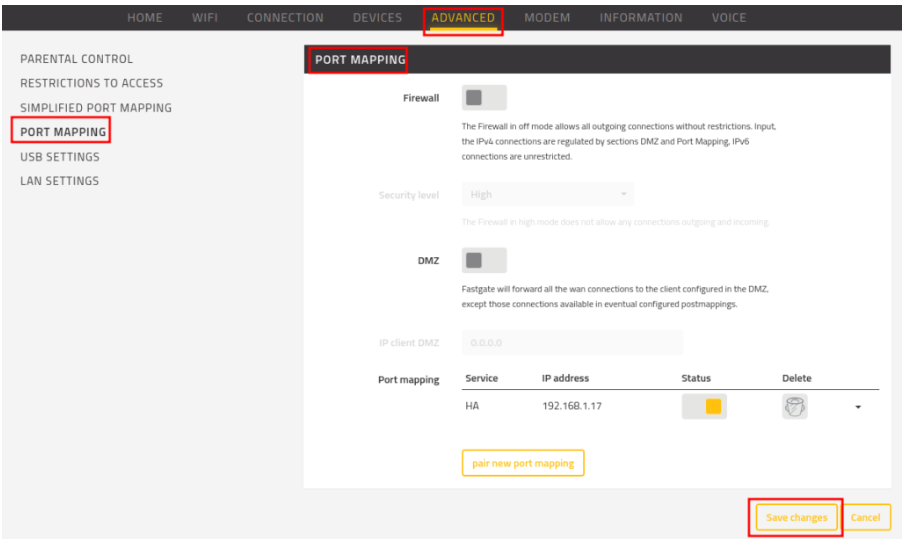
Fatto quanto spiegato sopra, premete su: SAVE CHANGES
In questo modo avrete fissato l’indirizzo DHCP del vostro HA, nel nostro caso è: 192.168.1.17
Ora, sempre nella stessa pagina, salite verso l’alto nella sezione: PORT MAPPING
e premete su PAIR NEW PORT MAPPING e configurate la finestra che compare come mostrato sotto.
192.168.1.17 è il nostro indirizzo di Home Assistant, voi mettete il vostro.
Fatta la configurazione premete su ADD.
A questo punto avrete la pagina sotto, premete su SAVE CHANGES
Bene, abbiamo finito.
Per testare se abbiamo fatto tutto correttamente apriamo un browser e inseriamo il nostro indirizzo creato con Duck DNS che era: http://pippo123.duckdns.org:8123/
se avrete fatto tutto correttamente vedrete la pagina di login del vostro Home Assistant.
Configure your Home Assistant APP
If you use the Home Assistant APP at this point will be necessary reconfigure it.
For do this press the three horizontal line present at the top left of APP and select APP CONFIGURATION.
Now select URL of Home Assistant and insert again: http://pippo123.duckdns.org:8123/
Of course, substitute the: http://pippo123.duckdns.org:8123/ with your Duck DNS that you had created.
Increase Security
For increase security of access to your HA is recommended to use a secure internet connection by HTTPS, stay tuned to see how to do.
If you are impatient and you are Italian, watch this video.