
IMPORTANT NOTE:
here we use the:
GD32F4xx_Firmware_Library_V2.1.0.rar
that you can find, for example here (on top of right – Firmware Library).
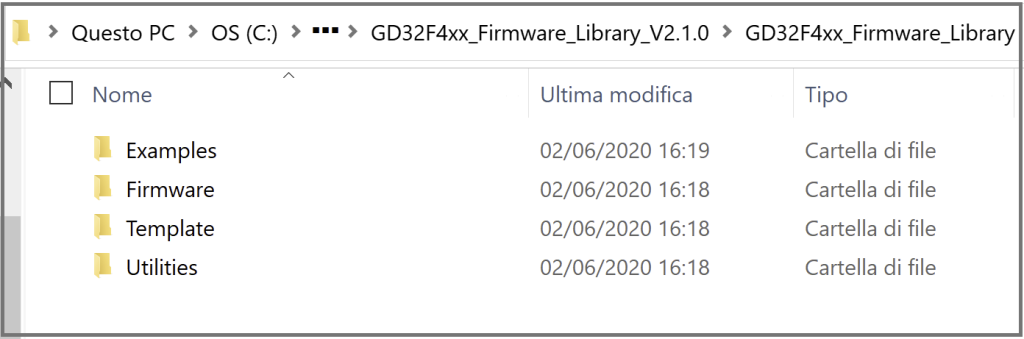
After you download and unzip the Firmware Library you can see a directory structure like below.
NOTE:
Our actual release is: GD32F4xx_Firmware_Library_V2.1.0
IMPORTANT:
In the TEMPLATE directory there are the ready to use configuration for KEIL and ARM.
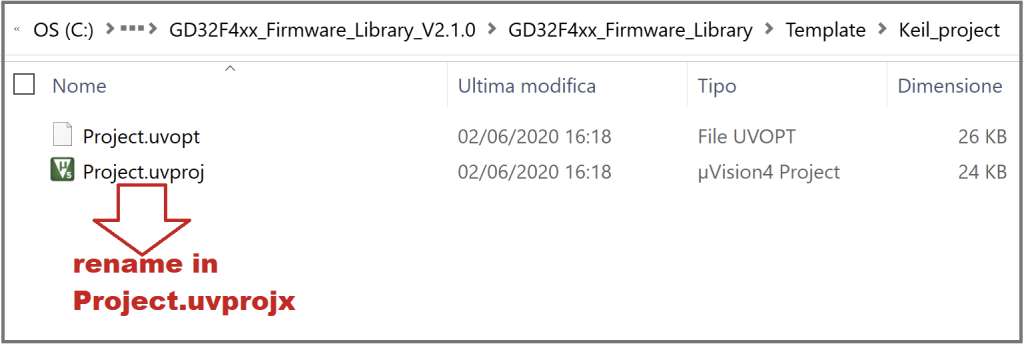
To use KEIL you must enter in the directory:
C:\…\GD32F4xx_Firmware_Library_V2.1.0\GD32F4xx_Firmware_Library\Template\Keil_project
and rename the:
Project.uvproj
in
Project.uvprojx
this for use the last KEIL version 5.xxx
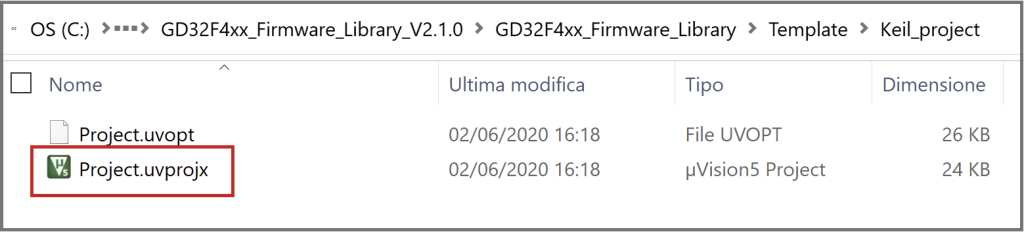
See below.
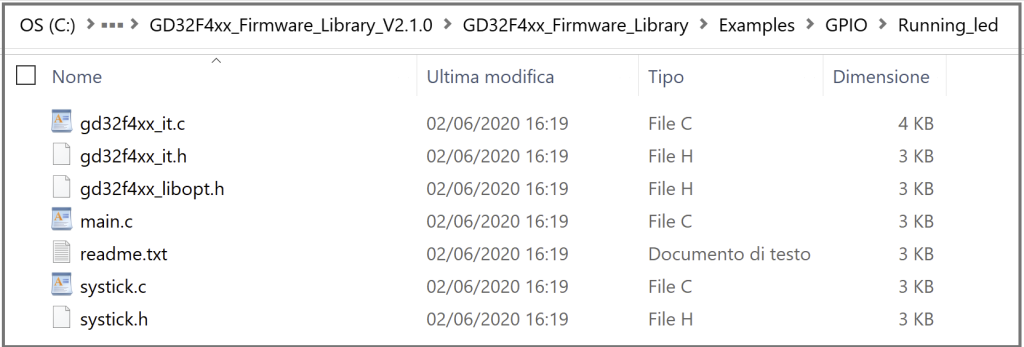
In the EXAMPLES directory, there are the software examples for all peripherals.
Let’s suppose you want to use the example of the blinking LED found in:
C:\…\GD32F4xx_Firmware_Library_V2.1.0\GD32F4xx_Firmware_Library\Examples\GPIO\Running_led
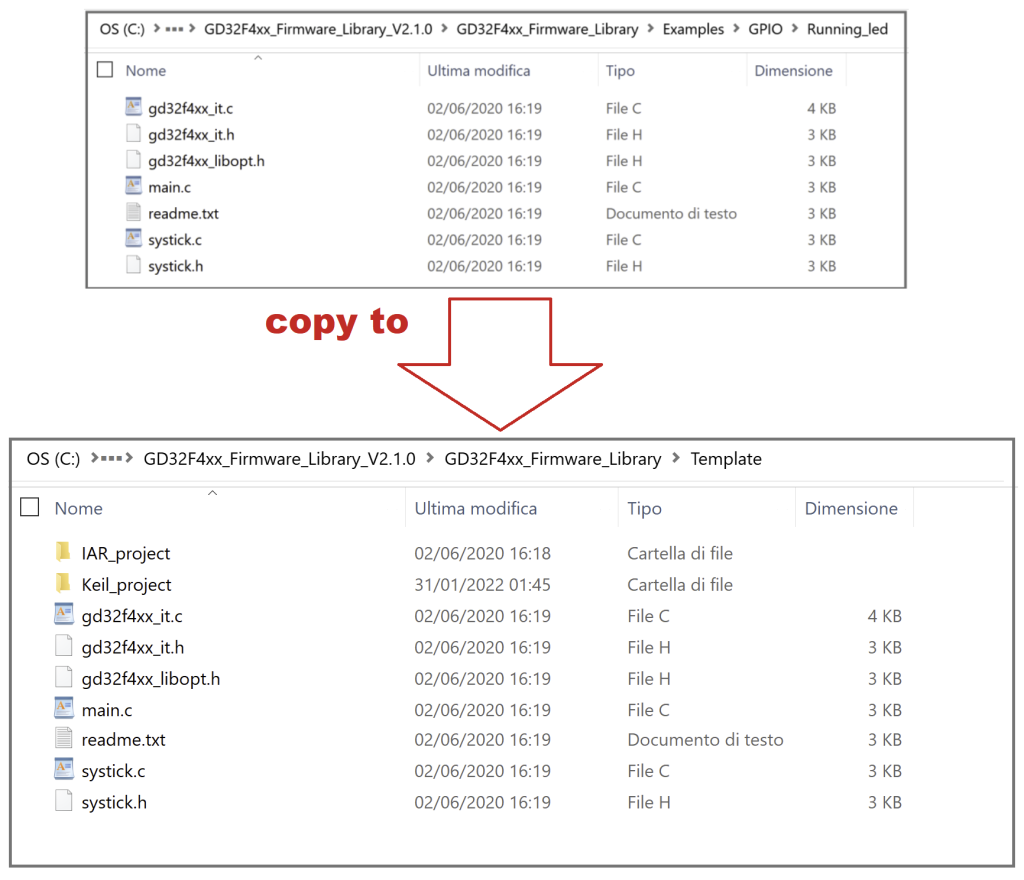
To do this you have to copy all the files from the directory:
C:\…\GD32F4xx_Firmware_Library_V2.1.0\GD32F4xx_Firmware_Library\Examples\GPIO\Running_led
in the directory:
C:\…\GD32F4xx\GD32F4xx_Firmware_Library_V2.1.0\GD32F4xx_Firmware_Library\Template
see below.
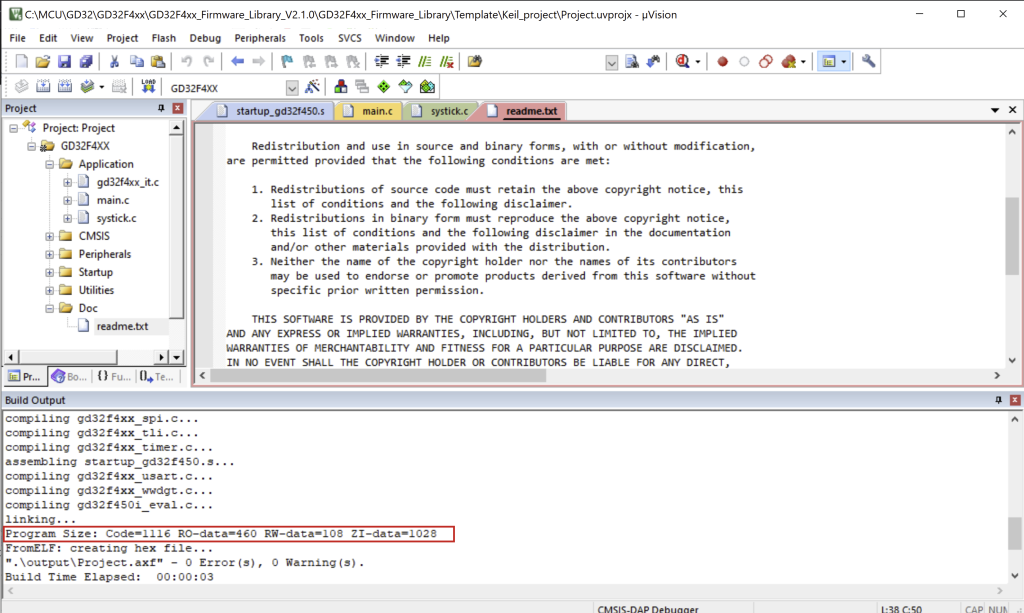
Now double click on the file:
Project.uvprojx
renamed before.
ATTENTION:
On some PCs due to antivirus installed, the above way of running the KEIL can cause errors.
If you are in this condition, do this:
Open the KEIL as ADMINISTRATOR and load the project mentioned above.
Compile it and you must see something like below.
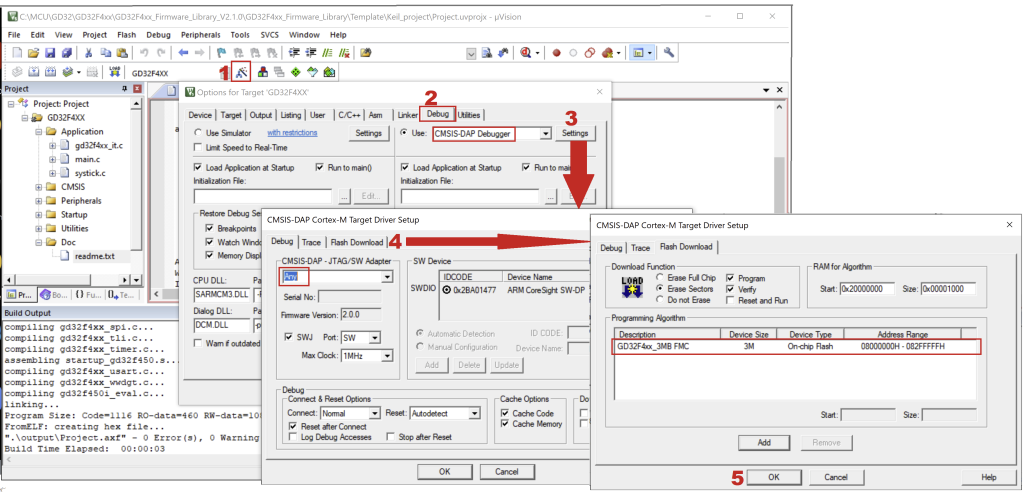
DEBUG
Now configure your debug interface.
In our case we use the emulator present on the GD32450I-EVAL so we select the
CMSIS-DAP DEBUGGER
and the FLASH LOADER named
GD32F4XX_3MB FMC
see the image below.
That is all, good work.