The Adafruit Motor Shield is build to work at 5V because the ARDUINO work at 5V.
Instead, the STM32 NUCLEO board, work at 3,3V.
For the different supply voltages the two boards are not compatible, to make them compatible you must do the two steps below:
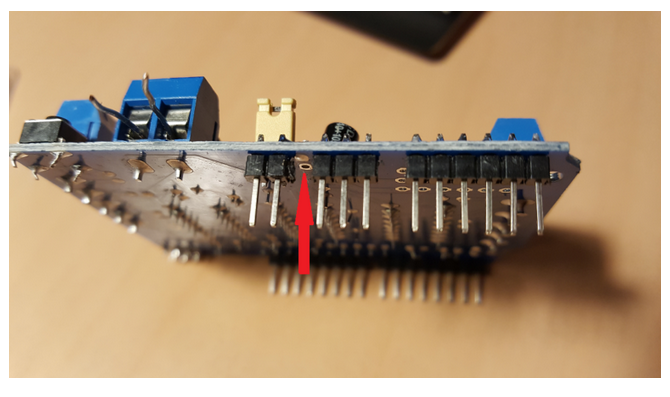
- First remove the pin connected to 5V, see the image below.
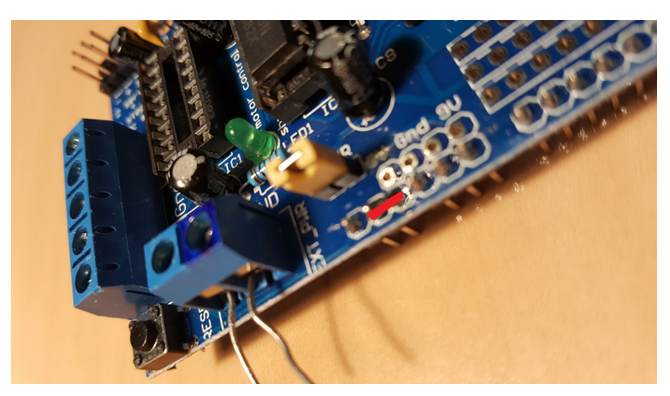
- Make a jumper between 3V and 5V, see the image below.
Thanks to this jumper now the Adafruit Motor Shield work at 3V and is compatible with the NUCLEO-BOARD
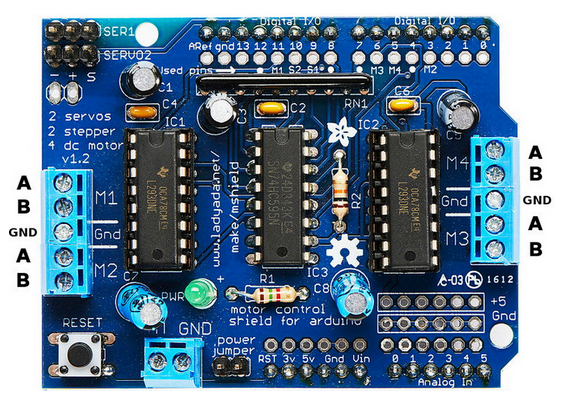
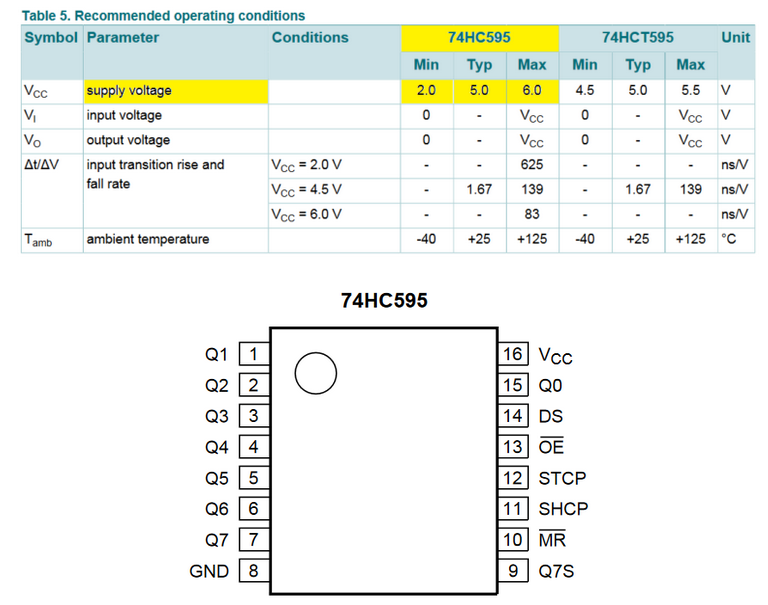
ATTENTION: Please control which 74xxx595 is present on your Adafruit Motor Shield.
It si necessary to use the 74HC595 because it has a voltage range from 2V to 6V, see the image below.
That is all that you must to do.
ATTENTION:
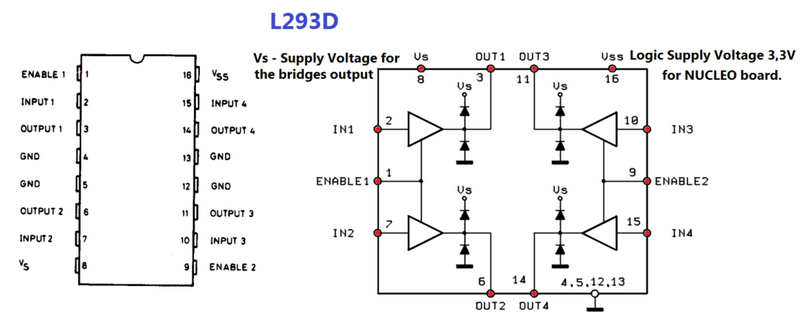
After this HW modification the L293D work in a voltage range outside it’s specification. Normally the L293D request a minimum of 4,5V on the Vss.
Fortunately I tested my board and it work well because the L293D has ViL is 1,5V and ViH is 2,3V.
For test if your hardware modification is OK, I suggest to use this example that is made using mBed compiler.
This example is for NUCLEO-F401RE, but is easy transfer it on a different NUCLEO board or MCU.
The GPIO port configuration for drive the Adafruit Motor Shield using the NUCLEO-F401RE are below.
DigitalOut clockpin(PB_5);  // SCHP or SCK - PB_5
DigitalOut latchpin(PA_6);  // STCP or RCK - PA_6
DigitalOut OE(PA_8);      // OE or G - PA_8
DigitalOut datapin(PA_9);  // DS or SER - PA_9
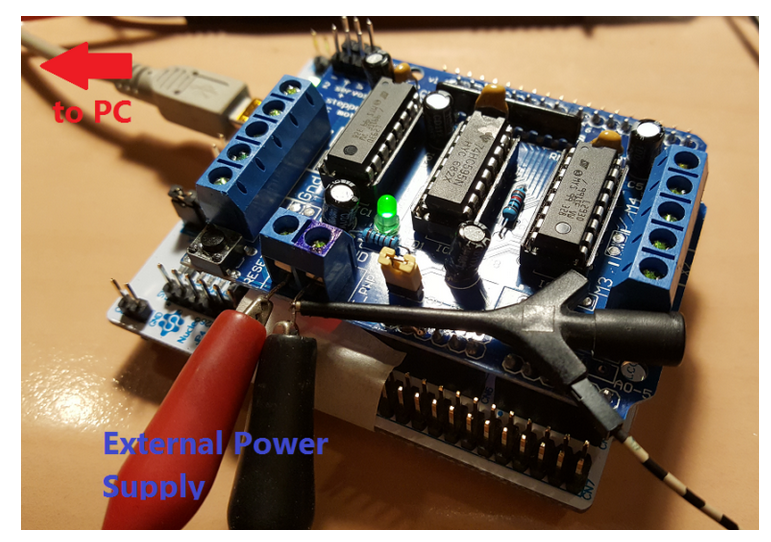
Connect you kit (Adafruit Motor Shield + NUCLEO-F401RE) to the PC and connect an External Power Supply (this is for drive your DC motor) to Adafruit Motor Shield.
See the image below.
Upload my example on the NUCLEO-F401RE board.
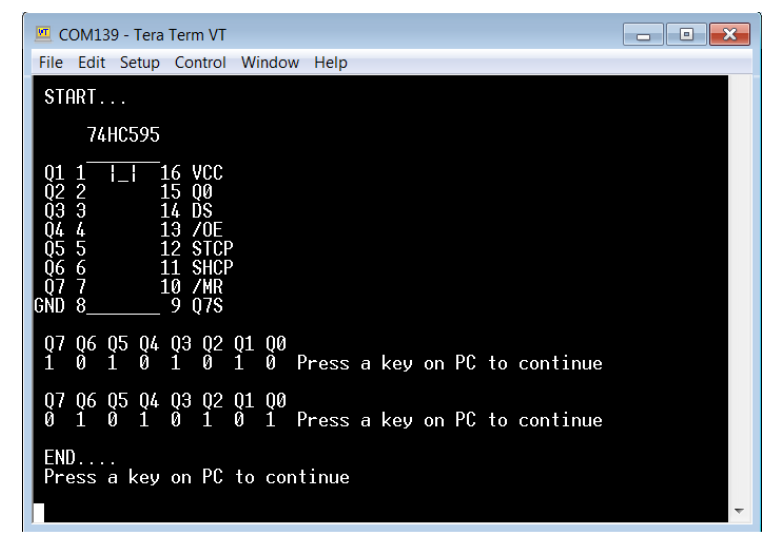
Open on PC a terminal emulator, I suggest TeraTerm, and configure it at 9600 8N1.
On your PC you must see something like le image below.