

For synchronize a Directory from local PC to local Synology NAS is necessary do the steps below.
If you need more info concerning Synology NAS see here.
- Synchronize by Synology Drive Server (on NAS) and Sinology Drive Client (for PC)
- Synchronize by Cloud Station Server (not yet supported)
Synchronize by Synology Drive Server (on NAS) and Sinology Drive Client (for PC)
In ITALIAN language see here.
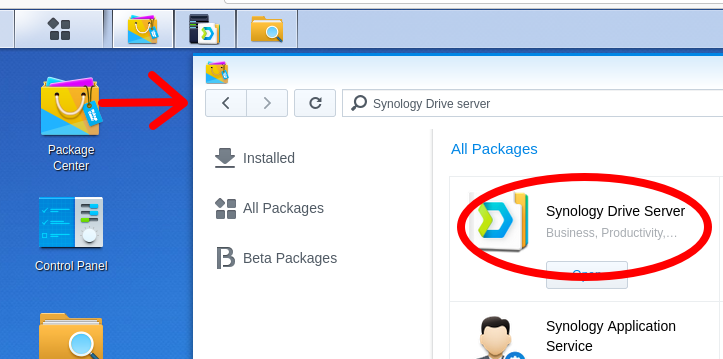
Install the Synology Drive Server on your NAS.
More info are here.
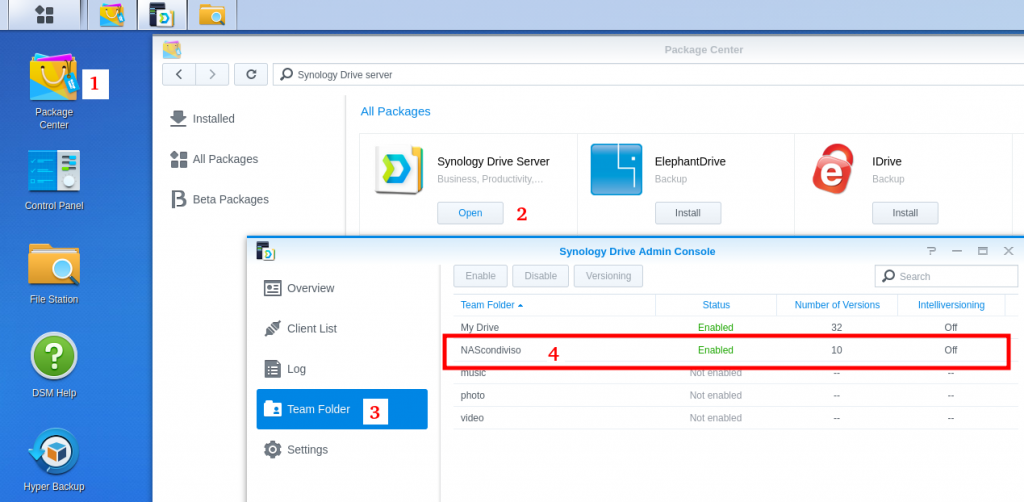
Run Synology Drive Server and configure it following the steps below.
Enable shared folders as team folders in Synology Drive Admin Console. See below.
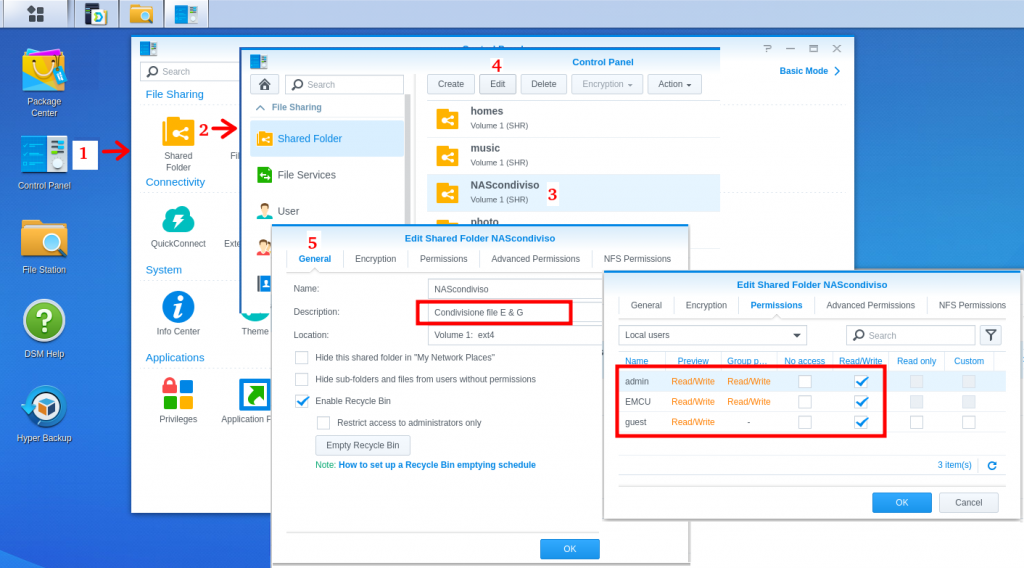
Now open Control Panel -> Shared Folder and check the shared folder configurations, see below.
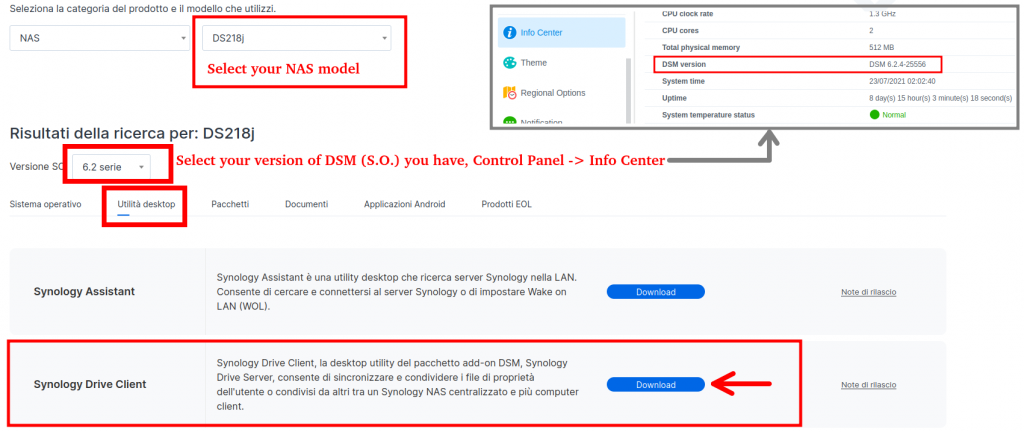
Now Download and install the Synology Drive Client utility from Synology Download Center.
NOTE:
For Linux Ubuntu, after the installation of the Synology Drive Client, for RUN it click on the icon: Show Applications

and click the Synology Drive Client for start it.
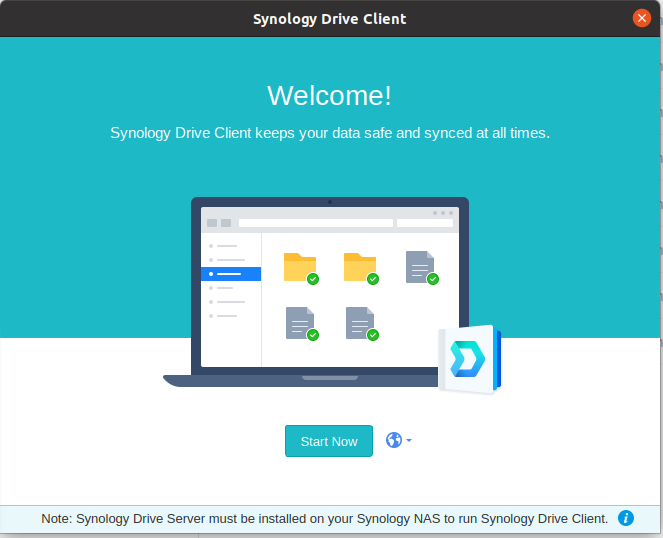
When the image below appears click on: Start Now
and follow the instructions that will appear on the screen.
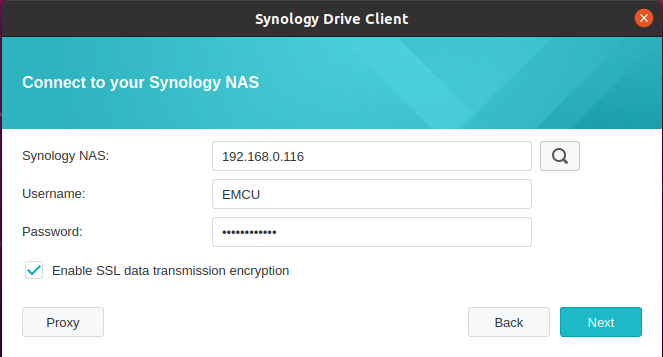
The first page request to select your NAS and insert USERNAME and password, see below.
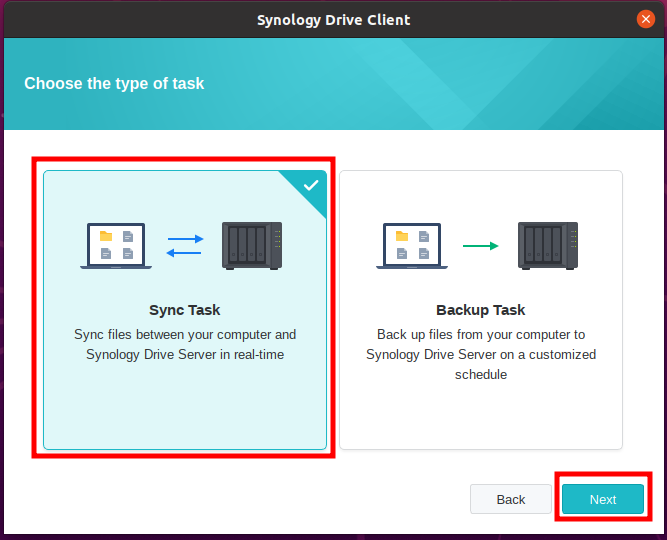
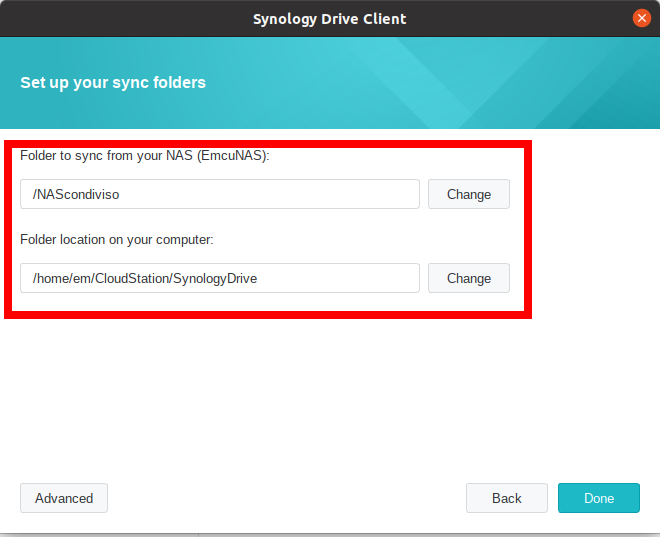
Next select SYNC TASK, see below.
IMPORTANT
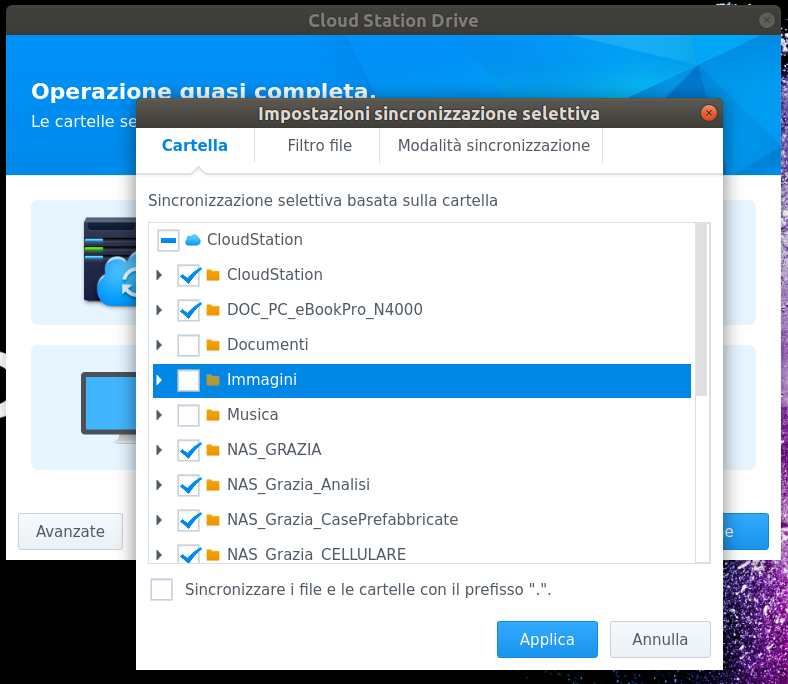
Check the configurations below that they are in line with the settings you have made previously, in particular: /NAScondiviso (/NASshared).
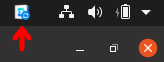
At this point press on DONE and the synchronization will start and you must see the icon show below on the top bar of UBUNTU.
Synchronize by Cloud Station Server (not yet supported)
ATTENTION:
Here we use the package Cloud Station Server that now is obsolete and is replaced by Synology Drive Server.
In any case is possible download the Cloud Station Server from here.
If you follow this guide that uses the Cloud Station Server, at the end of the first synchronization, a message will appear telling you that there is a new program version (Synology Drive Server) and if you accept Synology Drive Server is installed and will keep the configurations you have done in Cloud Station Server explained below
Enter in your NAS station using a web browser (Firefox, Chrome, ecc).
For find your NAS in your local LAN, use one of the below commands.
- http://find.synology.com/
- http://synologynas:5000/
ATTENTION – Sometimes if you use the VPN for connect your PC to your company server may be appear some problems to discovery your NAS.
If you has a problem try to install on your PC the: Synology Assistant
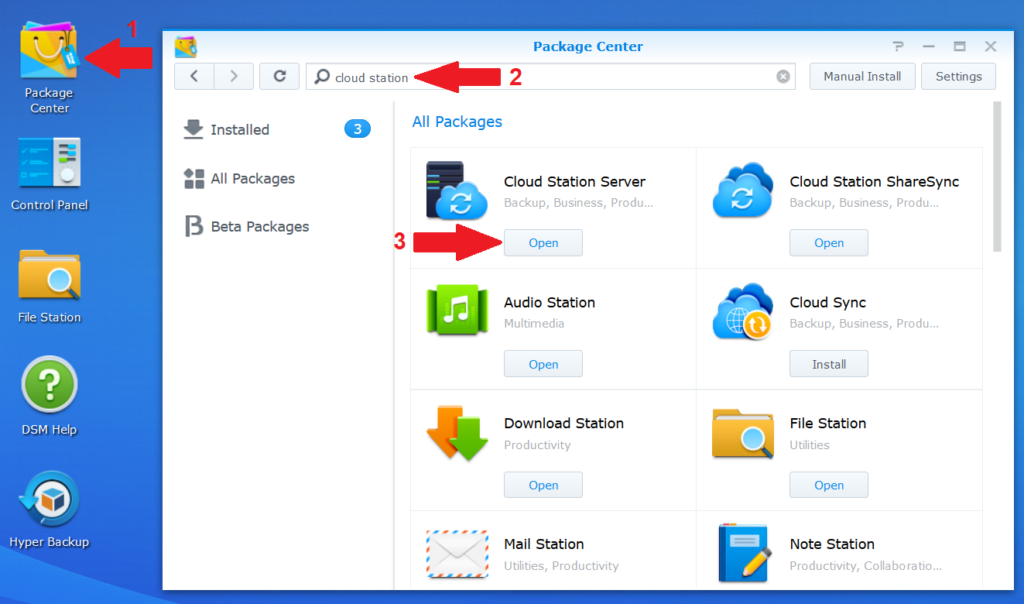
Now open:
Package Center
Next search:
cloud station and open it
see below.
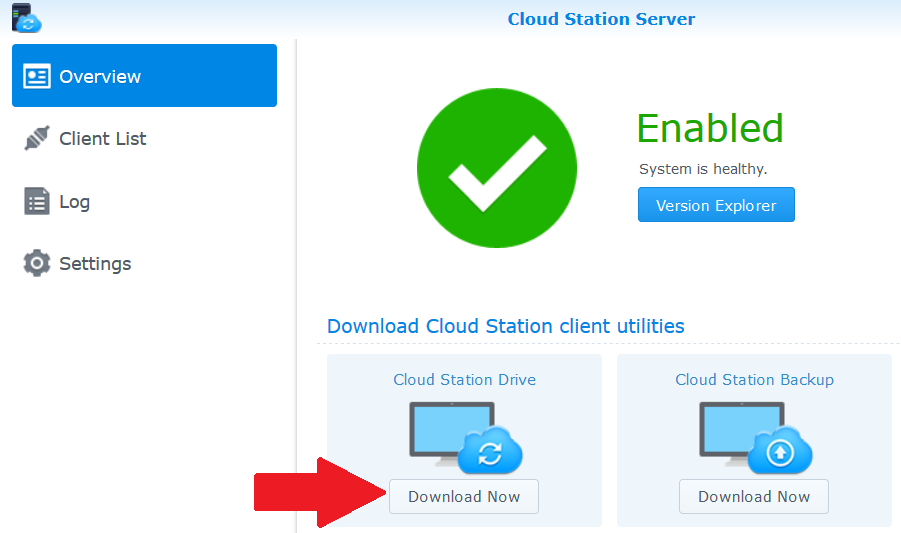
From the new window that appear download the Cloud Station Drive and install it on your PC.
For who use Linux (.deb) for install the SW, simply click right mouse button on the file and from the window that appear select: SW INSTALL
See below.
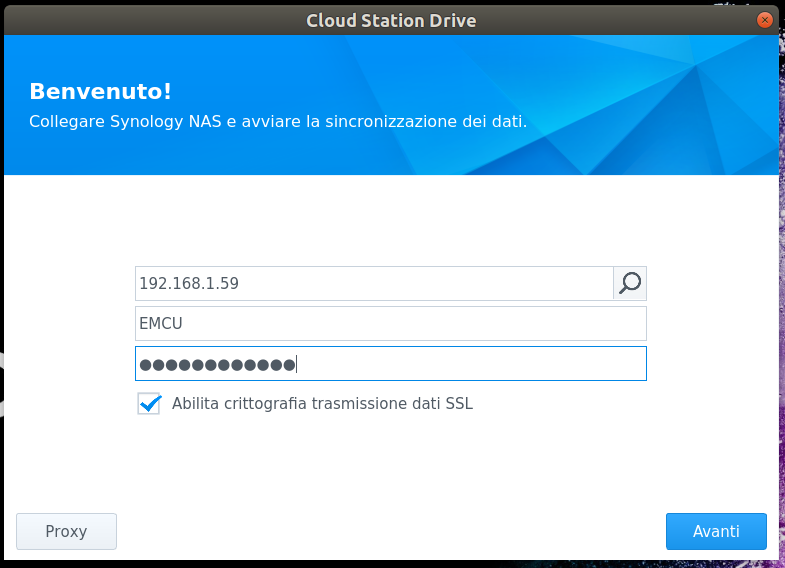
After the installation of the Cloud Station Drive, the first time that you start it you must configure it.
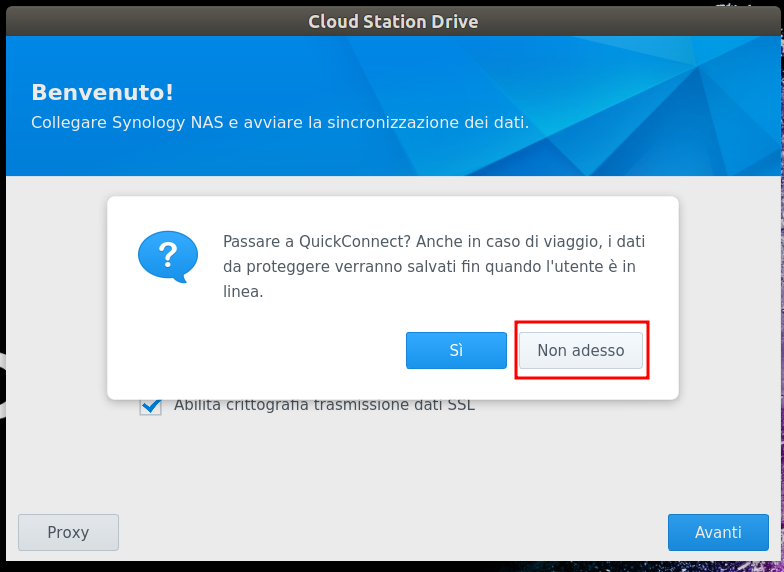
During the first configuration is possible that it ask to install the Quick Connect for sync the data trough Ethernet, at the moment chose NO.
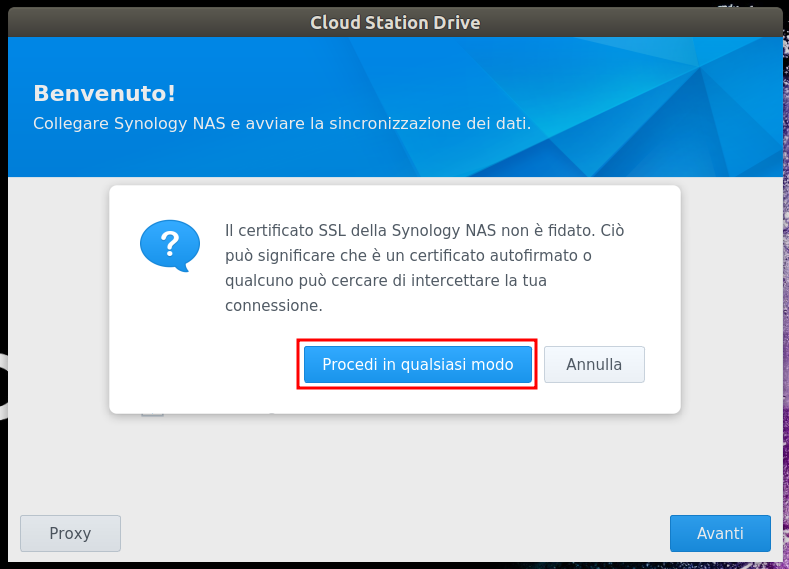
Also may be possible that appear a warning message concerning a poor security regarding SSL signed, chose CONTINUE.
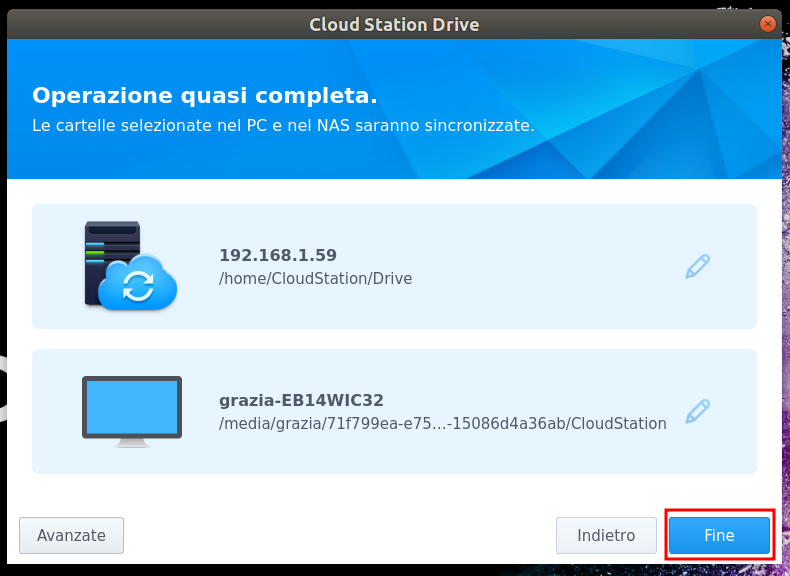
During the first setup will compare a box where you must insert your NAS IP and the directory to sync, as an example:
192.168.1.xxx
/home/CloudStation/Drive
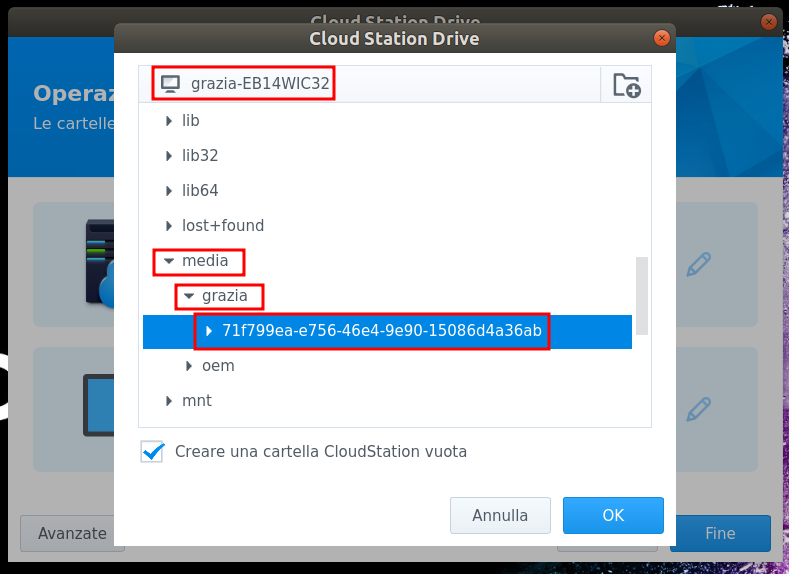
In the last box you see the local directory (on your PC) that will sync to the NAS.
For example:
/home/Enrico/CloudStation
Everything you write in the directory:
/home/Enrico/CloudStation
automatically must sync in your NAS
NOTE:
The path above are for a LINUX PC, if you use a Windows PC probably the path is similar to: /C:/Enrico/CloudStation
Below there are the images of the steps explain before.
In the first image, for find your NAS, press of the magnifying glass icon.
If you need to change the configuration of your installation see here.