
The ESP8266-01s or ESP8266-01 is WiFi module very cheap useful for make a home automation system.
In this guide we explain you how to use the ESP8266-01 inside the Home Assistant in your local WiFi network, of course is it possible access to Home Assistant also via web.
NOTE:
For use the ESP8266-01 in Home Assistant there are 3 steps to do that are:
1) prepare your kit
2) install in Home Assistant the ESPHome
3) program the ESP8266
On web there are a lot of kits that include relay, temperature and humidity sensor and more, all based on ESP8266-01s or ESP8266-01 WiFi module, see here.
SonOff internally use the ESP8266.
Prepare your kit
The kit that we use is:
ESP8266-01s, that in practice the same of ESP8266-01
and
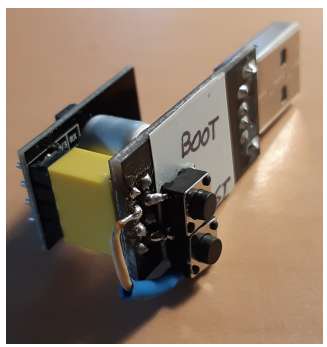
Serial to USB adapter for program the ESP8266-01
see our kit here
On the Serial to USB adapter is necessary add a button to GPIO_0 (BOOT mode) and a second button to RST pin, see the image below.

The generic wiring is shown below.
Below there is also the wiring from CHEN to VCC that is a must for enable the ESP8266, this wiring is already present in the Serial to USB adapter
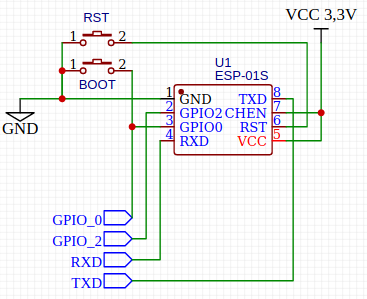
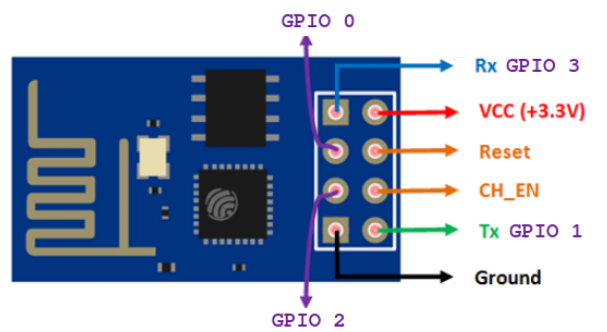
- CH_EN – Chip Enable, Active High
- GPIO_0 – General GPIO but if at START UP is LOW put the module into serial programming mode (BOOT mode)
- RESET – Connect to GND reset the ESP8266
For programming the ESP8266-01 is necessary install (on RaspBerry) the ESPHome and at the first time, is necessary download the FW via Serial to USB adapter to ESP8266-01
Now plug the ESP8266-01 on the Serial to USB adapter, next press the RST button on Serial to USB adapter (maintain the button pressed) and plug it on a USB port of your RaspBerry.
Now is time to install the ESPHome in Home Assistant, see the steps below.
Install in Home Assistant the ESPHome
For do this follow the steps below.
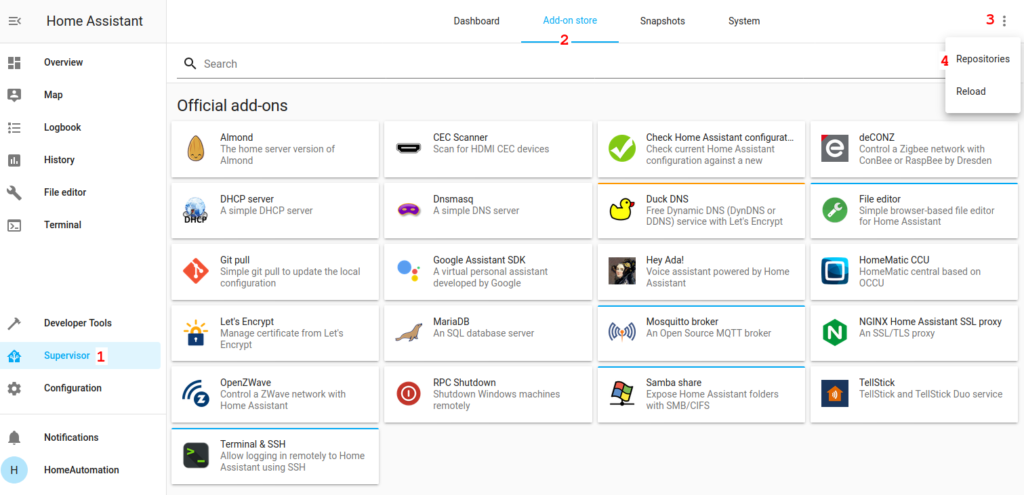
SUPERVISOR -> ADD-ON STORE -> press the vertical triple dot -> REPOSITORIES
and from the page that appear insert the link below:
https://github.com/esphome/hassio
Now, scroll down the page and select:

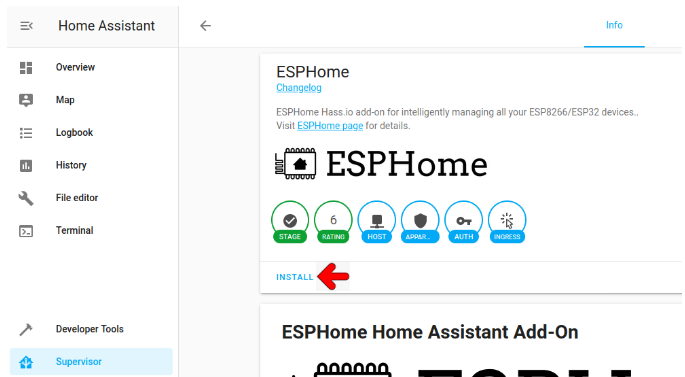
From the page that appears, see below, select: INSTALL
Be patience, for the installation is necessary some minutes.
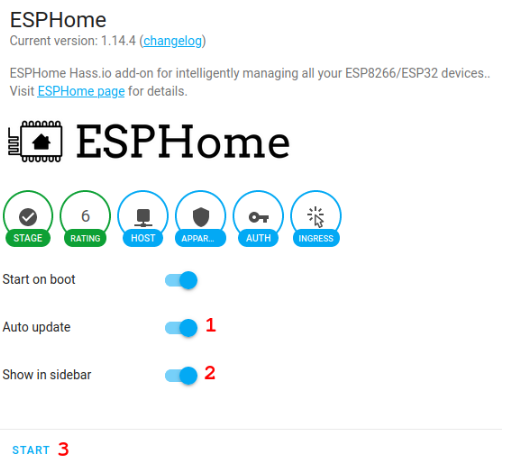
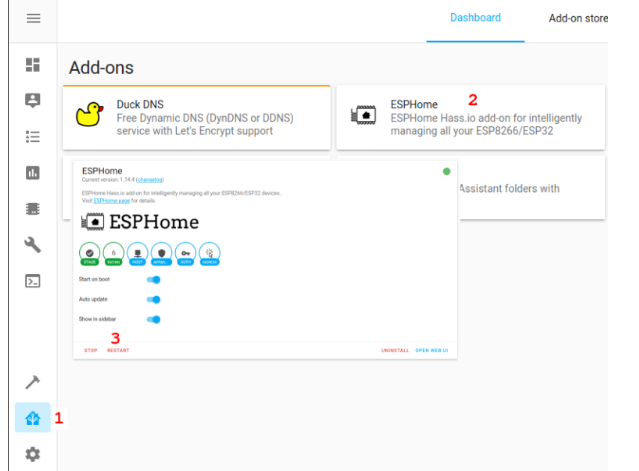
At the end of the installation we suggest to select:
AUTO UPDATE + SHOW IN SIDEBAR + START it, see below
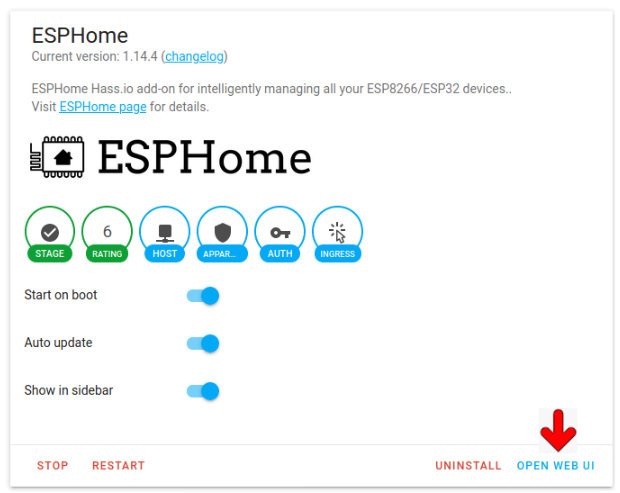
At this point click “Open Web UI”, see below.
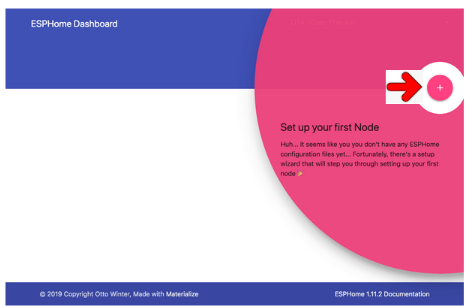
Now you must see a window like below, press on + and follow the instructions.
NOTE:
At question: select the device type
choose the: Generic ESP8266 (for example Sonoff)
At the end of the configuration you must see something like below.
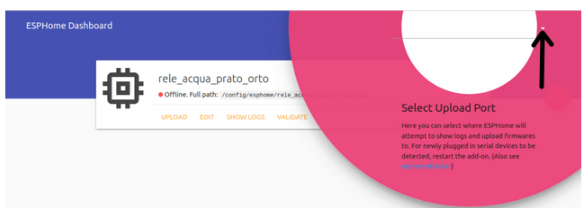
Select the UPLOAD PORT that must be a SERIAL PORT.
If you don’t find the SERIAL port, RESTART the ESPHome, the procedure is shown below.
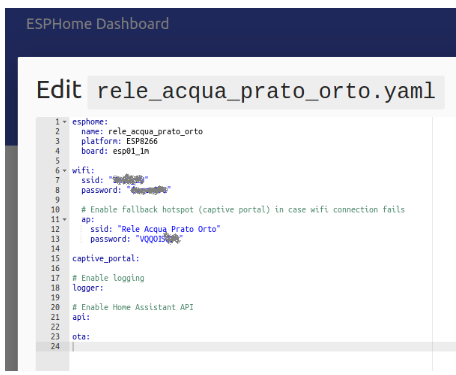
Now , with a SERIAL PORT selected, choose EDIT and check your configuration for SSID and PASSWORD
If something is wrong, remove your device and restart the procedure explained before.
If all is correct press:UPLOAD
You must see something like below.
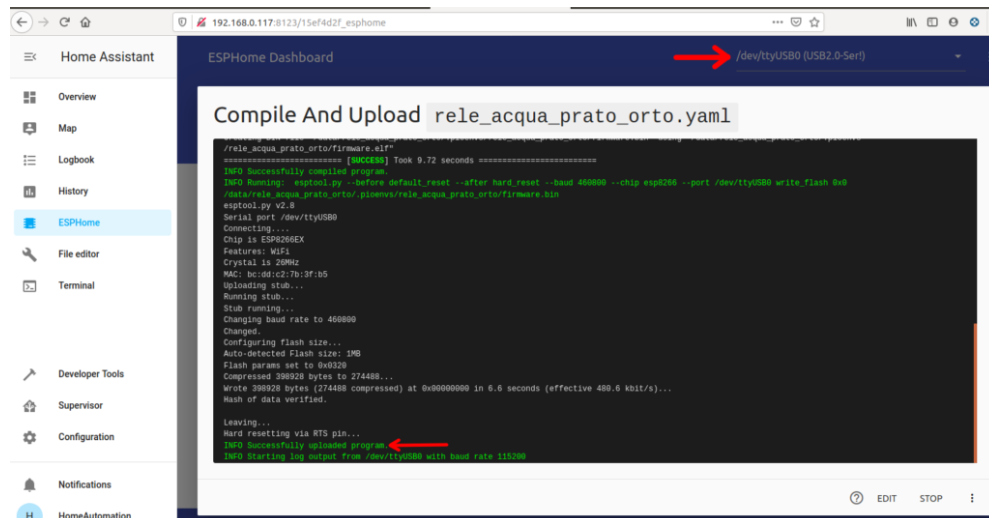
When you see: Info successfully upload program
press the RST button present on your programming kit.
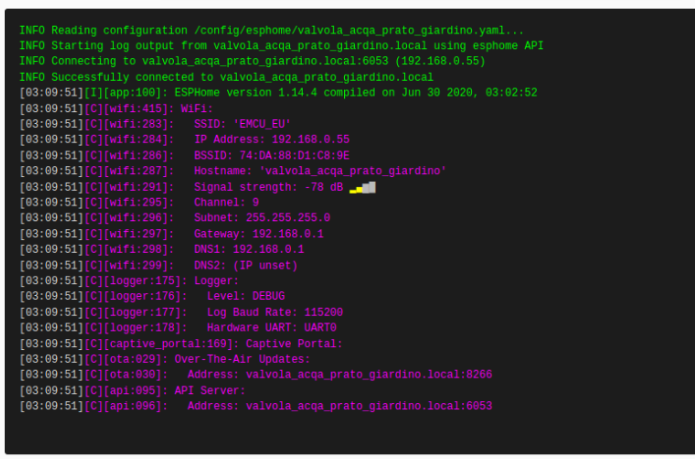
Now, be patient, until you see something like below.
Important is that you must see: WiFi Connected!
and when you see: Boot seems successful, resetting boot loop counter
press STOP.
Now for test your configuration do this:
1) Unplug your Serial to USB adapter kit from Raspberry,
2) Connect your Serial to USB adapter to an USB of your PC
3) Wait 3…6 seconds
4) Now waiting that the indicator of your ESP6266-01s goes green (see below) and press on the: Show Logs

You must see something like below, this means that all is OK.
NOTE:
When you Turn OFF and again Turn ON your ESP8266 before that Home Assistant detect the status of your ESP8266 are necessary waiting 5…10 seconds.
Below two ESP8266-01 in our Home Assistant network, the green circle indicate that both are online.
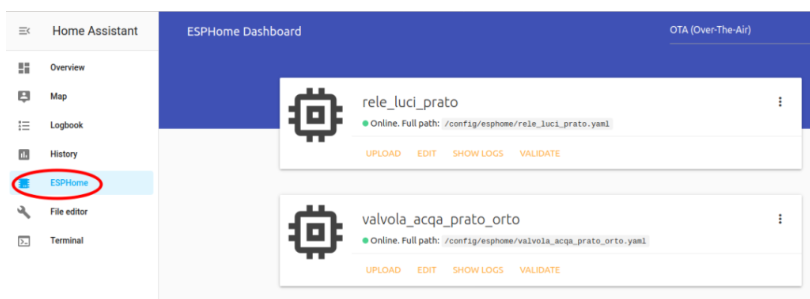
Now is possible use the ESP8266-01 via OTA (WiFi).
ESP8266-01 to drive a Relay
For use the ESP8266-01 to drive a Relay is possible make a dedicated PCB but more easy is to use a ready to use kit, we used this kit.

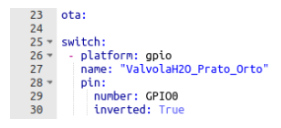
Now is necessary program the right functionality (OUTPUT mode on GPIO_0) in our ESP8266-01.
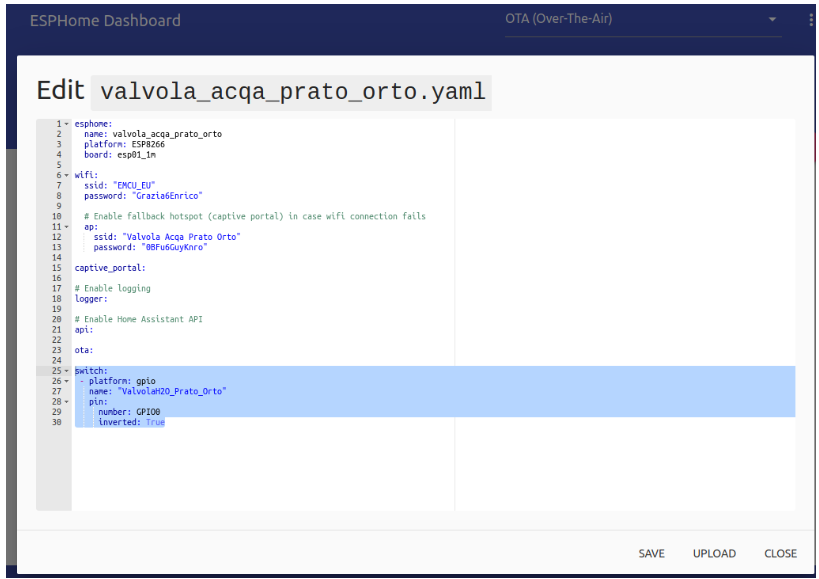
For do this EDIT your ESPHome object and insert, at the end of file, the line below (from switch until True) don’t forget the – symbol before the platform and respect the indentation of the lines.
ValvolaH2O_Prato_Orto is the name that will appear in your Home Assistant.
Now press on UPLOAD to update the configuration on your ESP8266-01 module, at the end of the upload you must see something like below.
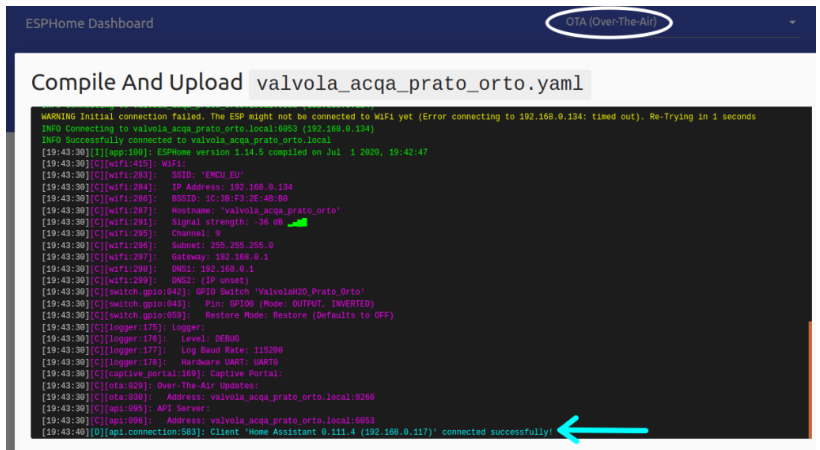
That is all, now you are ready to use your relay kit in Home Assistant.
Add a CARD with your ESP8266-01 kits
See this tutorial the section: Customize your home page
LINKs