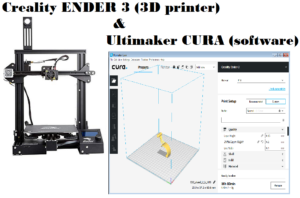
After start CURA (my version is: 3.5.1) you must configure a new printer, in our case is the ENDER 3, for do this follow the steps below.
Select: SETTINGS → PRINTER → MANAGE PRINTERS, see below.
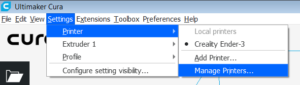
From the new page ADD a new printer, in our case ENDER 3, and next select: MACHINE SETTINGS.
Configure the page as show below.
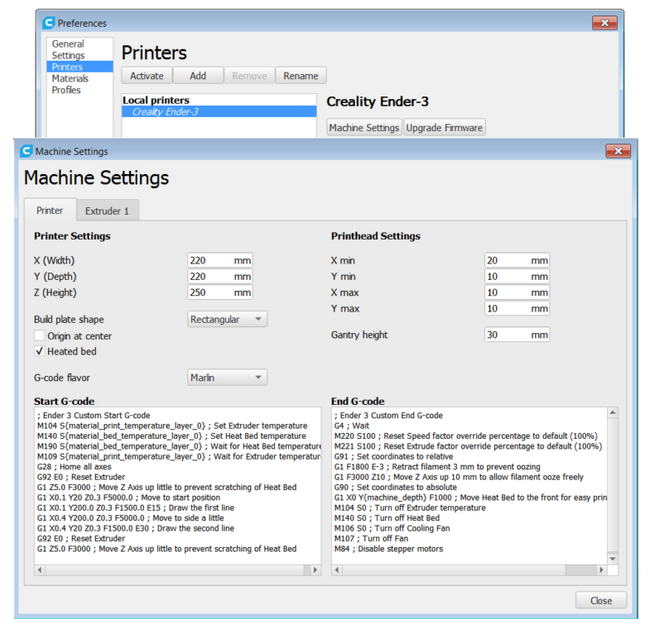
It’s important to configure the dimension of the plate (Printer Setting) at:
X: 220 mm
Y: 220 mm
Z: 250 mm
It’s also necessary configure the Start-G and the End-G code.
My configurations are below.
Start-G code
; Ender 3 Custom Start G-code
M104 S{material_print_temperature_layer_0} ; Set Extruder temperature
M140 S{material_bed_temperature_layer_0} ; Set Heat Bed temperature
M190 S{material_bed_temperature_layer_0} ; Wait for Heat Bed temperature
M109 S{material_print_temperature_layer_0} ; Wait for Extruder temperature
G28 ; Home all axes
G92 E0 ; Reset Extruder
G1 Z5.0 F3000 ; Move Z Axis up little to prevent scratching of Heat Bed
G1 X0.1 Y20 Z0.3 F5000.0 ; Move to start position
G1 X0.1 Y200.0 Z0.3 F1500.0 E15 ; Draw the first line
G1 X0.4 Y200.0 Z0.3 F5000.0 ; Move to side a little
G1 X0.4 Y20 Z0.3 F1500.0 E30 ; Draw the second line
G92 E0 ; Reset Extruder
G1 Z5.0 F3000 ; Move Z Axis up little to prevent scratching of Heat Bed
End-G code
; Ender 3 Custom End G-code
G4 ; Wait
M220 S100 ; Reset Speed factor override percentage to default (100%)
M221 S100 ; Reset Extrude factor override percentage to default (100%)
G91 ; Set coordinates to relative
G1 F1800 E-3 ; Retract filament 3 mm to prevent oozing
G1 F3000 Z10 ; Move Z Axis up 10 mm to allow filament ooze freely
G90 ; Set coordinates to absolute
G1 X0 Y{machine_depth} F1000 ; Move Heat Bed to the front for easy print removal
M104 S0 ; Turn off Extruder temperature
M140 S0 ; Turn off Heat Bed
M106 S0 ; Turn off Cooling Fan
M107 ; Turn off Fan
M84 ; Disable stepper motors
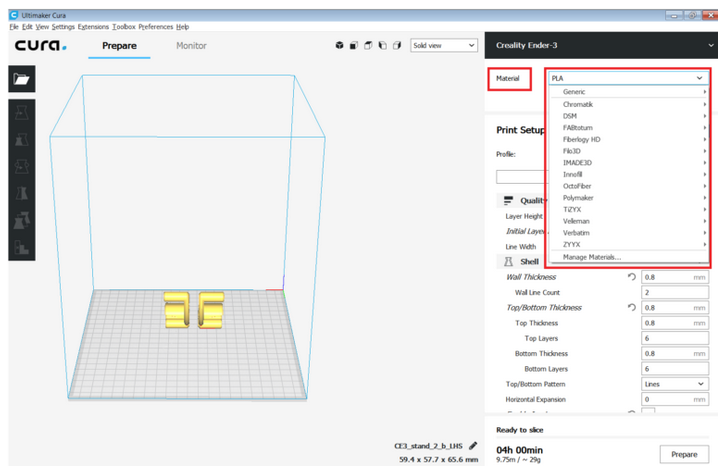
Now is necessary choose the filament that you need to use, see below.
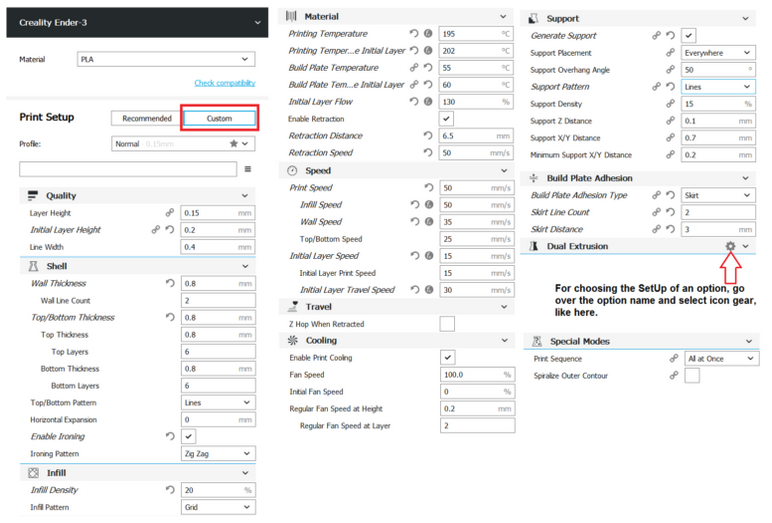
Now we must configure the options regarding the QUALITY, the SHELL, etc.
Below there is a global overview of all configurations.
Don’t worry we will explain step by step all in this tutorial.
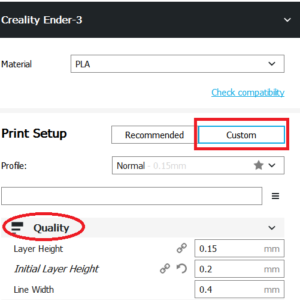
Box QUALITY
- LAYER HEIGHT for a standard 3D print select 0,15 mm, if you need more precision choose 0,1 mm or if you are hurry choose 0,2 mm.
The max resolution for CURA 3 is 0,1 mm. - INITIAL LAYER HEIGHT is the first layer drawing by the 3D printer, we suggest to choose 0,2 mm for leave on the printer area, a good thickness of material (PLA in our case).
- LINE WIDTH is the diameter of the extruder, in CURA 3 is 0,4 mm.
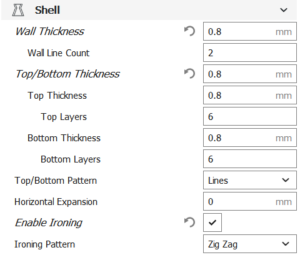
Box SHELL
- WALL THICKNESS is the thickness of the wall, we suggest 0,8 mm but if you need a more robust construction increase this value.
ATTENTION: in our case we had configure the LINE WIDTH at 0,4 mm (is the diameter of the CURA 3 nozzle) so the WALL THICKNESS must be an multiple of LINE WIDTH, 0,8 or 0,12 or 0,16 , etc. - WALL LINE COUNT, is automatic calculate in base of the WALL THICKNESS
- TOP/BOTTOM THICKNESS, are the thickness that must be a multiple of the value set in the LAYER HEIGHT.
- IRONING, we use this because is a good solution for hide or better connect two successive lines.
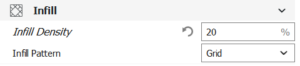
Box INFILL
- INFILL DENSITY, it’s a percentage that you choose based on how dense you want your print.
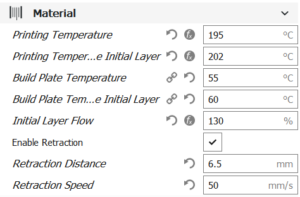
Box MATERIAL
- The parameters below, regarding the temperature, depends of the material that you use.
The configuration below are for PLA but depend also of the PLA that you use.
We use the CCTREE PLA 3D Stampante a Filamento – BIANCO, if you use another PLA see the data sheet of your PLA. - We consider very important enable the RETRACTION DISTANCE and RETRACTION SPEED because thanks to this parameter the printer retract the PLA during a movement from one print area to another one.
Thanks to this option we avoid that printer release a filaments from one part to anoter one.
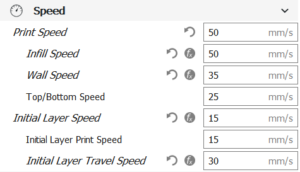
Box SPEED
- Speed are very important because conditioning the final result of our printing.
How to set this parameters ?
First look on internet your PLA or other filament that you use and see the comments of the users
Second try to print the same object with a different speeds until you find a good soluction.
Below there are our configuration for printing the CCTREE PLA 3D Stampante a Filamento – BIANCO
In any case remember the low speed means optimum quality of print. - it’s very important use a low speed for first level (INITIAL LAYER SPEED and INITIAL LAYER PRINT SPEED, this give to PLA the time to join well to the plate.
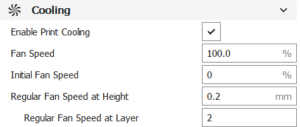
Box COOLING
- In this box is important that INITIAL FAN SPEED is set to 0.
This is because at the beginning we want it to be as hot as possible to make good adhesion of the PLA to the plate.
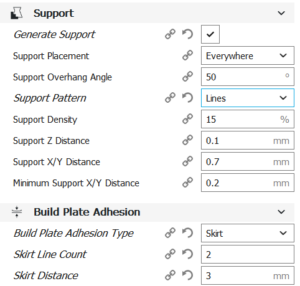
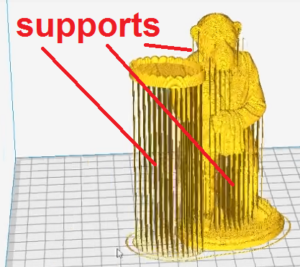
Box SUPPORT
- It’s important enable support if you have something that is suspended in the air.
See the monkey below.
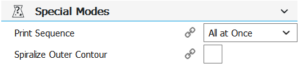
Box SPECIAL MODES
- If you has more than one object to print, by this option you have the possibility to print all the objects in parallel – ALL AT ONCE (suggested) or one by one.
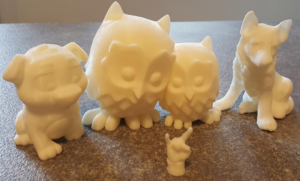
Below there are some 3D printing examples using the setup explain above.