
- Introduction
- How to create a new AUTOMATION by WebUi
- How to create a new AUTOMATION by automations.yaml
- Structure of automation in Home Assistant
- Graphic Editor (WebUi)
- automations.yaml file
- Example that turn on the home entrance light if is night using the Xiaomi Motion sensor and Shelly 1
Introduction
In Home Assistant we have two possibilities to create automation that are:
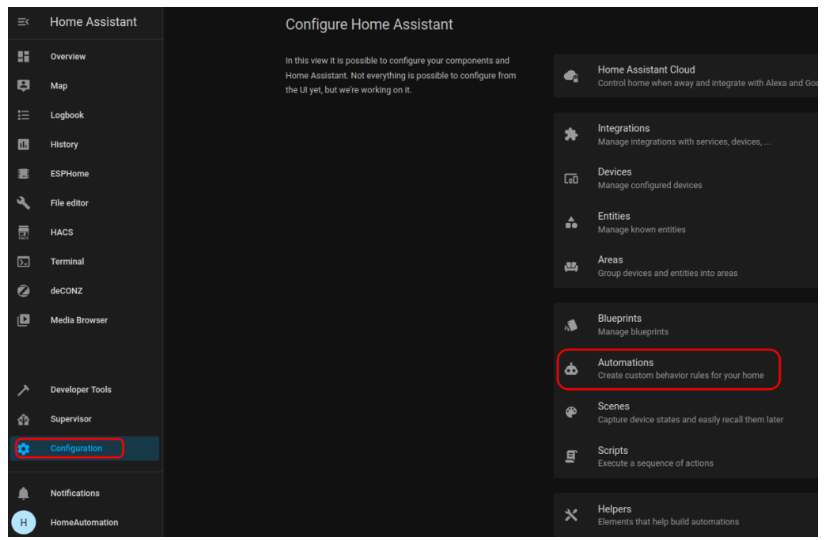
- Through the editor from WebUi (find it in: CONFIGURATION -> AUTOMATIONS)
- Writing the automation directly into the automations.yaml file
How to create a new AUTOMATION by WebUi
For create a new AUTOMATION select:
CONFIGURATION -> AUTOMATIONS
How to create a new AUTOMATION by automations.yaml
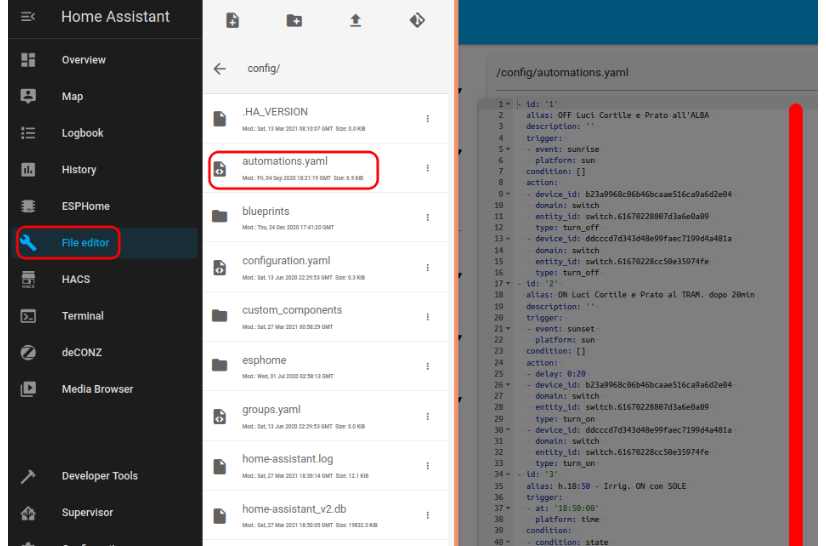
automations.yaml is a file that contain your automation
Normally is more convenient use the graphic editor (WebUi), in case of some complicate configurations is necessary write the code directly in automations.yaml file.
Structure of automation in Home Assistant
The automations in Home Assistant, in general, are composed of 3 parts:
- A trigger
- A condition
- An action
This is an example:
(trigger) When Enrico gets home
(condition) and it’s after sunset
(action) Turn on the hall lights
Graphic Editor (WebUi)
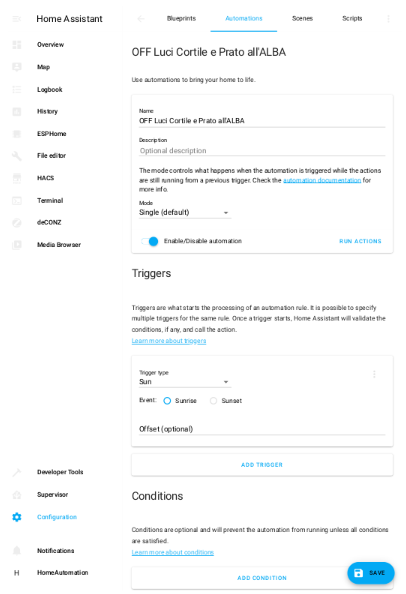
We suggest watching this video (YouTube), below there is an example that turn off the external lighting in sun rising in graphic editor (WebUi).
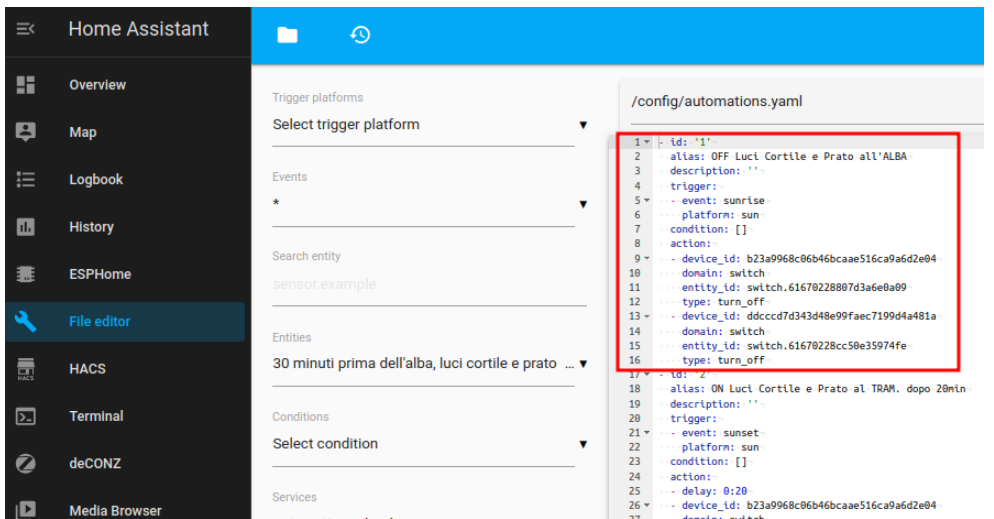
automations.yaml file
Below there is the same automation (OFF Luci Cortile e Prato all’ALBA) in the automations.yaml file
Example that turn on the home entrance light if is night using the Xiaomi Motion sensor and Shelly 1
You can buy the Xiaomi Motion Sensor for example here and
Shelly 1 here.
For more info about the way to use Shelly 1 see here.
For more info about the way to use Xiaomi Motion Sensor see here.
For create a new automation select: CONFIGURATION -> AUTOMATIONS
and press the blue button: + ADD AUTOMATION
from the new page that appears press: CREATE.
And from the new page that appears press: SKIP
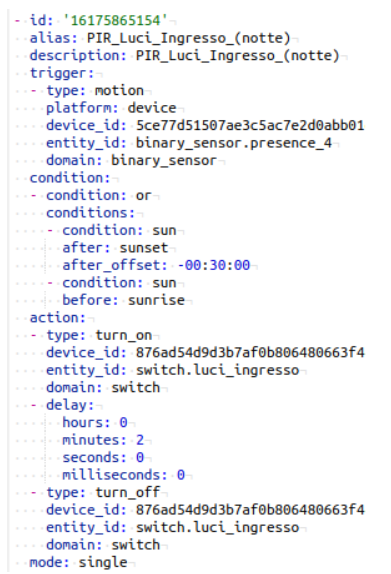
Now compile the page as shown below.
NOTE:
In box TRIGGERS – Motion Sensor is our XIAOMI Motion Sensor (PIR)
In box CONDITIONS – we choose to enable our automation only in the night (SUNRISE – SUNSET)
In box ACTIONS – Luci Ingresso is the name of our Shelly 1 and
… The first ACTION is turn-on the light
… The second ACTION is a delay of 2 minutes
… The third ACTION is turn-off the light
If you are curious and want more info concerning the MODE see here.
If you are curious and want more info concerning the SUN see here.
Now SAVE it.
The equivalent yaml automation is shown below.
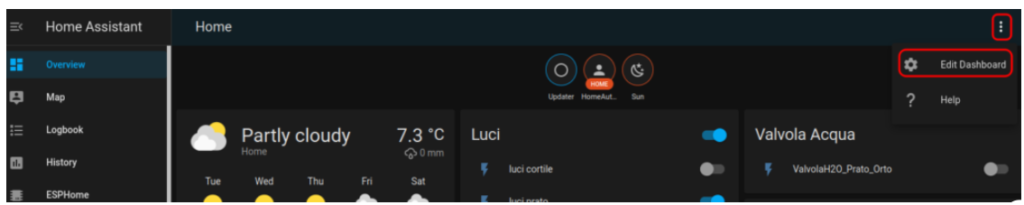
If you want add your automation in Home Assistant home page (Overview) for enable/disable it do this:
press the 3 vertical dots on the top right and select: EDIT DASHBOARD, see below.
Next press the button: + ADD CARD
and from the new page that appears select: BUTTON
and compile the new page as shown below.
