
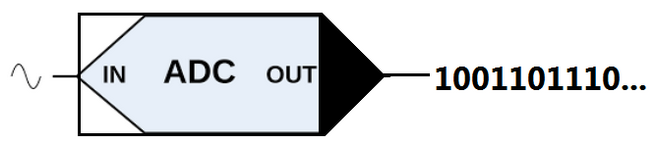
In electronics, an analog-to-digital converter (ADC, A/D, or A-to-D) is a system that converts an analog signal, such as a sound picked up by a microphone or light entering a digital camera, into a digital signal.
There are several ADC architectures, in MCU normaly there are SAR (successive approximation register) and sometime SIGMA-DELTA (also known as a delta-sigma ADC)
- SAR is very fast
- SIGMA-DELTA is slow but is very precise
The stadard ADC in STM32 is SAR at 12bit but there are also some STM32 that include also a SIGMA-DELTA ADC at 16bit.
That are a lot of parameters that specify the precision, stability, resolution, aliasing, etc, of an ADC, for more info see here.
On STM32 the SAR A/D conversion of the various channels can be performed in single, continuous, scan or discontinuous mode.
The result of the ADC is stored in a left – or right – aligned 16-bit data register.
Moreover, the ADC also implements the analog watchdog feature, which allows the application to detect if the input voltage goes outside the user-defined higher or lower thresholds.
It is possible use the ADC in Polling, in Interrupt and in DMA mode. (by: Mastering STM32)
For more info see the datasheet and the reference manual of the STM32 that you want to use.
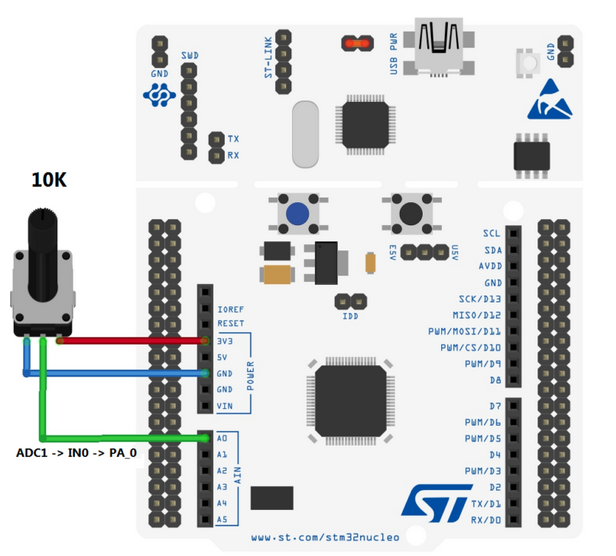
In this example we use the ADC1 (SAR A/D at 12bit) of the NUCLEO-F401RE in Interrupt mode.
The ADC that we use is: ADC1 -> IN0 -> PA_0
The schematic is below.
This example is based on CUBE-MX and ATOLLIC, now we suggest to translate it in STM32CubeIDE.
- Open Cube-MX and create a new project using the NUCLEO-F401RE.
- In the PINOUT tab (of the CUBE-MX) select ADC1 channel IN0.
- In the CONFIGURATION tab (of the CUBE-MX) select ADC1 and configure, in PARAMETER SETTINGS tab, the SAMPLE TIME at speed that you prefer, we used: 84.
Next go in NVIC SETTINGS tab and flag the Interrupt box.
NOTE:
In this configuration, in the PARAMETER SETTINGS tab, we configure the CONTINUOS CONVERSION MODE as DISABLE, this means that afther each conversion the ADC generate an Interrupt and stop itself.
For do a new conversion is necessary restart the ADC. - Generate the project for TrueSTudio (ATOLLIC).
- Here there is the CUBE-MX configuration file.
OK, at this point is necessary insert in the main.c the callback function for manage the Interrupt from the ADC and start the ADC conversion.
It is also necessary implement the printf for send the result of the AD to the PC via virtual com.
In the main.c insert the lines shown below, please insert it in the right positions.
/* USER CODE BEGIN Includes */

#include <stdio.h>

/* USER CODE END Includes */
/* USER CODE BEGIN PV */
/* Private variables -----------------------------------------*/

uint16_t adc_value;

/* USER CODE END PV */
/* USER CODE BEGIN 0 */
void HAL_ADC_ConvCpltCallback(ADC_HandleTypeDef* hadc1)
{
adc_value = HAL_ADC_GetValue(hadc1);
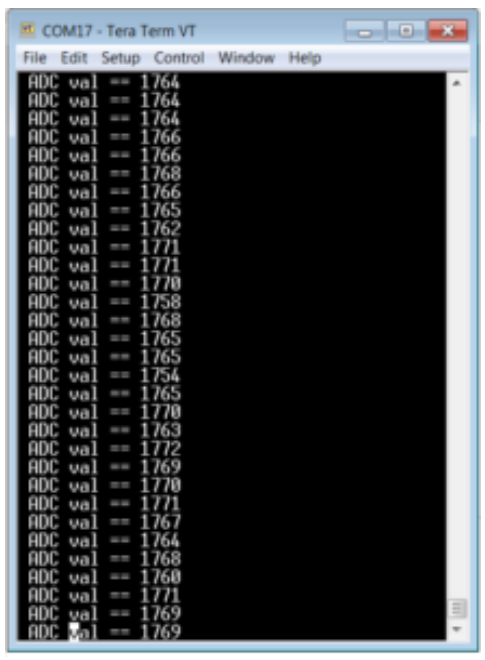
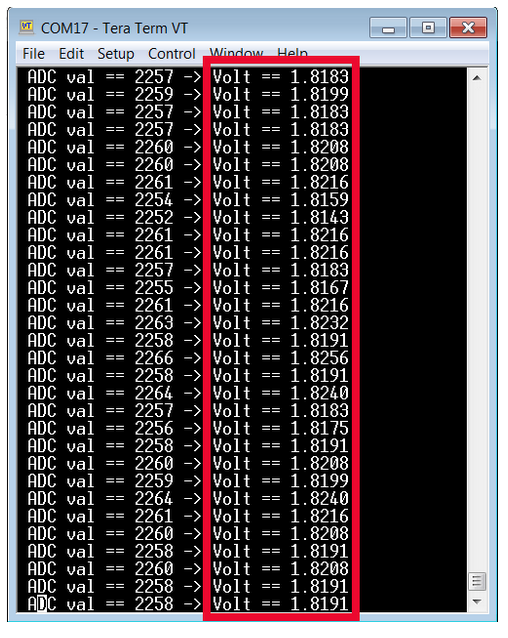
printf("\n\r ADC val == %d", adc_value);
HAL_ADC_Start_IT(hadc1); // Re-Start ADC1 under Interrupt
// this is necessary because we don'use
// the Continuos Conversion Mode
}
/* USER CODE END 0 */
/* USER CODE BEGIN 2 */

HAL_ADC_Start_IT(&hadc1); // Start ADC1 under Interrupt

/* USER CODE END 2 */
/* USER CODE BEGIN 4 */

int __io_putchar(int ch)
{
 uint8_t c[1];
 c[0] = ch & 0x00FF;
 HAL_UART_Transmit(&huart2, &*c, 1, 10);
 return ch;
}

int _write(int file,char *ptr, int len)
{
 int DataIdx;
 for(DataIdx= 0; DataIdx< len; DataIdx++)
   {
    __io_putchar(*ptr++);
   }
return len;
}

/* USER CODE END 4 */
How to use this example
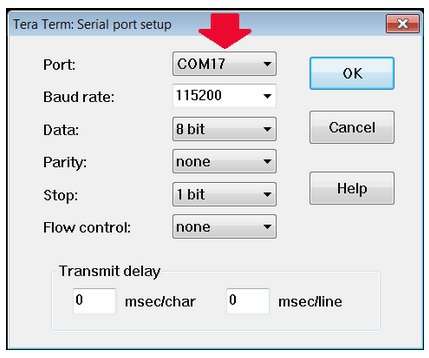
Compile and debug the project, open a TeraTerm terminal configure as show below.
Please, choose the right com port.
How to get the SW for this project
Please send us an email and ask us the password for: ADCnuF401ato
Please specify also your country and your city, this are only for our personal statistics.
Get the SW clicking here, but remember to ask us the password for open it.
NOTE
There is another more complicated release, of this ADC example, that send also the ADC value converted in VOLT via printf.
Thank you, to this site, that share the routine for convert FLOAT to STRING.
See below.
If you need this release please, send us an email and ask us the password for (Ref.Cod.):
ADCnuF401atoVoltOut
Please specify also your country and your city, this are only for our personal statistics.
Get the this SW by clicking here, but remember to ask us the password for open it.
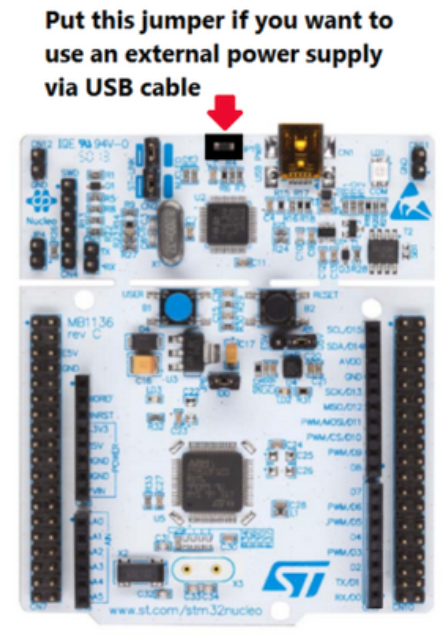
Power Supply NOTE:
- Use FIREFOX or CHROME for a clear view of the images present in this web site
- For enlarge the image press: CTRL +
For reduce the image press: CTRL –